I recently shared on how you can deploy the latest VMware Cloud Foundation (VCF) 5.1 release with vSAN Express Storage Architecture (ESA) using Nested ESXi and leveraging a custom vSAN ESA HCL JSON file, which I had created to workaround the required vSAN ESA pre-check during the VCF Bringup […]
Before, I wrote about testing the Logitech Z906 5.1 speakers and Creative Labs Sound Blaster X4 sound card for True Surround sound and what that experience was like. I managed to get the surround […]
Welcome to the exciting world of Llama-2 models! In today’s blog post, we’re diving into the process of installing and running these advanced models. Whether you’re a seasoned AI enthusiast or just starting out, understanding Llama-2 models is crucial. These models, known for their efficiency and versatility in handling large-scale data, are a game-changer in the field of machine learning.
In this Shortcut, I give you a step-by-step process to install and run Llama-2 models on your local machine with or without GPUs by using llama.cpp. As I mention in Run Llama-2 Models, this is one of the preferred options.
Here are the steps:
Step 1. Clone the repositories
You should clone the Meta Llama-2 repository as well as llama.cpp:
Complete the request form, then navigate to the directory where you downloaded the GitHub code provided by Meta. Run the download script, enter the key you received, and adhere to the given instructions:
$ cd llama
$ ./download
Step 3. Create a virtual environment
To prevent any compatibility issues, it’s advisable to establish a separate Python environment using Conda. In case Conda isn’t already installed on your system, you can refer to this installation guide. Once Conda is set up, you can create a new environment by entering the command below:
#https://docs.conda.io/projects/miniconda/en/latest/

#These four commands quickly and quietly install the latest 64-bit version #of the installer and then clean up after themselves. To install a different #version or architecture of Miniconda for Linux, change the name of the .sh #installer in the wget command.

mkdir -p ~/miniconda3
wget https://repo.anaconda.com/miniconda/Miniconda3-latest-Linux-x86_64.sh -O ~/miniconda3/miniconda.sh
bash ~/miniconda3/miniconda.sh -b -u -p ~/miniconda3
rm -rf ~/miniconda3/miniconda.sh

#After installing, initialize your newly-installed Miniconda. The following #commands initialize for bash and zsh shells:

~/miniconda3/bin/conda init bash
~/miniconda3/bin/conda init zsh
$ conda create -n llamacpp python=3.11
Step 4. Activate the environment
Use this command to activate the environment:
$ conda activate llamacpp
Step 5. Go to llama.cpp folder and Install the required dependencies
Type the following commands to continue the installation:
$ cd ..
$ cd llama.cpp
$ python3 -m pip install -r requirements.txt
Step 6.
Compile the source code
Option 1:
Enter this command to compile with only CPU support:
$ make
Option 2:
To compile with CPU and GPU support, you need to have the official CUDA libraries from Nvidia installed.
Double check that you have Nvidia installed by running:
$ nvcc --version
$ nvidia-smi
Export the the CUDA Home environment variable:
$ export CUDA_HOME=/usr/lib/cuda
Then, you can launch the compilation by typing:
$ make clean && LLAMA_CUBLAS=1 CUDA_DOCKER_ARCH=all make -j
Step 7. Perform a model conversion
Run the following command to convert the original models to f16 format (please note in the example I show examples the 7b-chat model / 13b-chat model / 70b-chat model):
$ ./quantize -h
usage: ./quantize [--help] [--allow-requantize] [--leave-output-tensor] [--pure] model-f32.gguf [model-quant.gguf] type [nthreads]

  --allow-requantize: Allows requantizing tensors that have already been quantized. Warning: This can severely reduce quality compared to quantizing from 16bit or 32bit
  --leave-output-tensor: Will leave output.weight un(re)quantized. Increases model size but may also increase quality, especially when requantizing
  --pure: Disable k-quant mixtures and quantize all tensors to the same type

Allowed quantization types:
   2  or  Q4_0   :  3.56G, +0.2166 ppl @ LLaMA-v1-7B
   3  or  Q4_1   :  3.90G, +0.1585 ppl @ LLaMA-v1-7B
   8  or  Q5_0   :  4.33G, +0.0683 ppl @ LLaMA-v1-7B
   9  or  Q5_1   :  4.70G, +0.0349 ppl @ LLaMA-v1-7B
  10  or  Q2_K   :  2.63G, +0.6717 ppl @ LLaMA-v1-7B
  12  or  Q3_K   : alias for Q3_K_M
  11  or  Q3_K_S :  2.75G, +0.5551 ppl @ LLaMA-v1-7B
  12  or  Q3_K_M :  3.07G, +0.2496 ppl @ LLaMA-v1-7B
  13  or  Q3_K_L :  3.35G, +0.1764 ppl @ LLaMA-v1-7B
  15  or  Q4_K   : alias for Q4_K_M
  14  or  Q4_K_S :  3.59G, +0.0992 ppl @ LLaMA-v1-7B
  15  or  Q4_K_M :  3.80G, +0.0532 ppl @ LLaMA-v1-7B
  17  or  Q5_K   : alias for Q5_K_M
  16  or  Q5_K_S :  4.33G, +0.0400 ppl @ LLaMA-v1-7B
  17  or  Q5_K_M :  4.45G, +0.0122 ppl @ LLaMA-v1-7B
  18  or  Q6_K   :  5.15G, -0.0008 ppl @ LLaMA-v1-7B
   7  or  Q8_0   :  6.70G, +0.0004 ppl @ LLaMA-v1-7B
   1  or  F16    : 13.00G              @ 7B
   0  or  F32    : 26.00G              @ 7B
          COPY   : only copy tensors, no quantizing
Step 9. Run one of the prompts
Option 1:
You can execute one of the example prompts using only CPU computation by typing the following command:
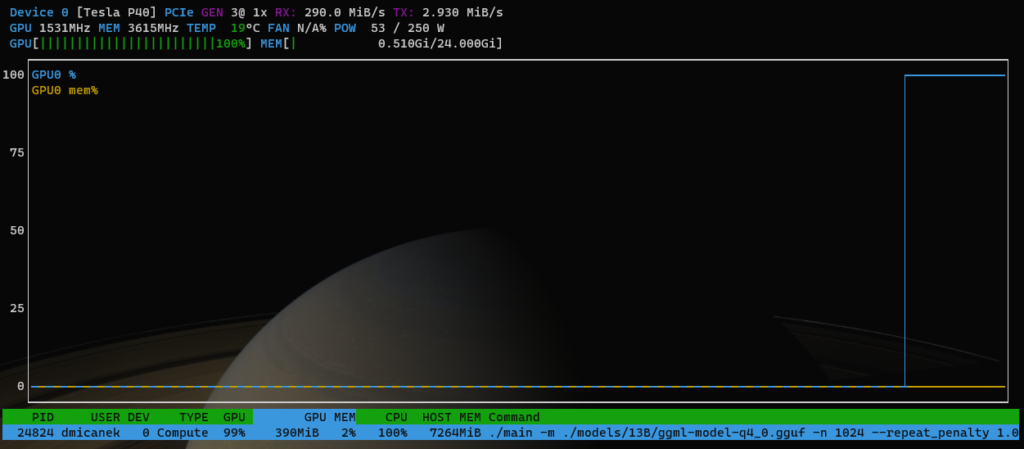
If you have GPU enabled, you need to set the number of layers to offload to the GPU based on your vRAM capacity. You can increase the number gradually and check with the nvtop command until you find a good spot.
You can see the full list of parameters of the main command by typing the following:
Have you ever tried to automate a specific vSphere operation but not sure which vSphere API to use or if know which vSphere API to use you unsure how to actually use it? This is something I frequently see and get asked about quite often! Did you know about this hidden little gem that has […]
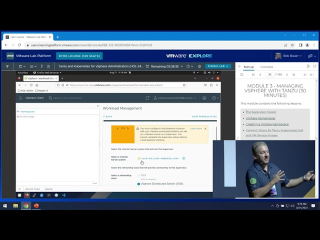
Link to Lab: https://userui.learningplatform.vmware.com/HOL/catalog/lab/13926 🌟 Welcome to our VMware Expert-Led Guided Workshop Series! 🌟 In this series, you’ll explore various VMware Hands-On Labs, each led by our team of VMware experts. Dive deep into different VMware solutions, gaining hands-on experience and valuable insights! 🔹 Featured Lab: Tanzu and Kubernetes for vSphere Administrators (HOL-2413-01-SDC) 🔹 This workshop covers: 1️⃣ Module 1: Introduction to vSphere with Tanzu (30 min, Level: Intermediate) Get started with the basics of vSphere and Tanzu integration. 2️⃣ Module 2: What’s New for vSphere 8 Update 1 (15 min, Level: Beginner) Discover the latest updates and features in vSphere 8. 3️⃣ Module 3: Managing vSphere with Tanzu…Read More
Learn from anywhere! Join us virtually at 9 AM for a LIVE Keynote with Amanda Blevins, VP and CTO, Americas at
@vmware by Broadcom. Register today to secure your spot:
Learn from anywhere! Join us virtually at 9 AM for a LIVE Keynote with Amanda Blevins, VP and CTO, Americas at @vmware by Broadcom. Register today to secure your spot:
This next-generation architecture for VMware Cloud on AWS enabled by an Amazon EC2 M7i bare-metal diskless instance featuring a custom 4th Gen Intel Xeon processor is really bringing a lot of value to our customers. As they combined this instance with scalable and flexible storage options, it […]
For Private AI in HomeLAB, I was searching for budget-friendly GPUs with a minimum of 24GB RAM. Recently, I came across the refurbished NVIDIA Tesla P40 on eBay, which boasts some intriguing specifications:
GPU Chip: GP102
Cores: 3840
TMUs: 240
ROPs: 96
Memory Size: 24 GB
Memory Type: GDDR5
Bus Width: 384 bit
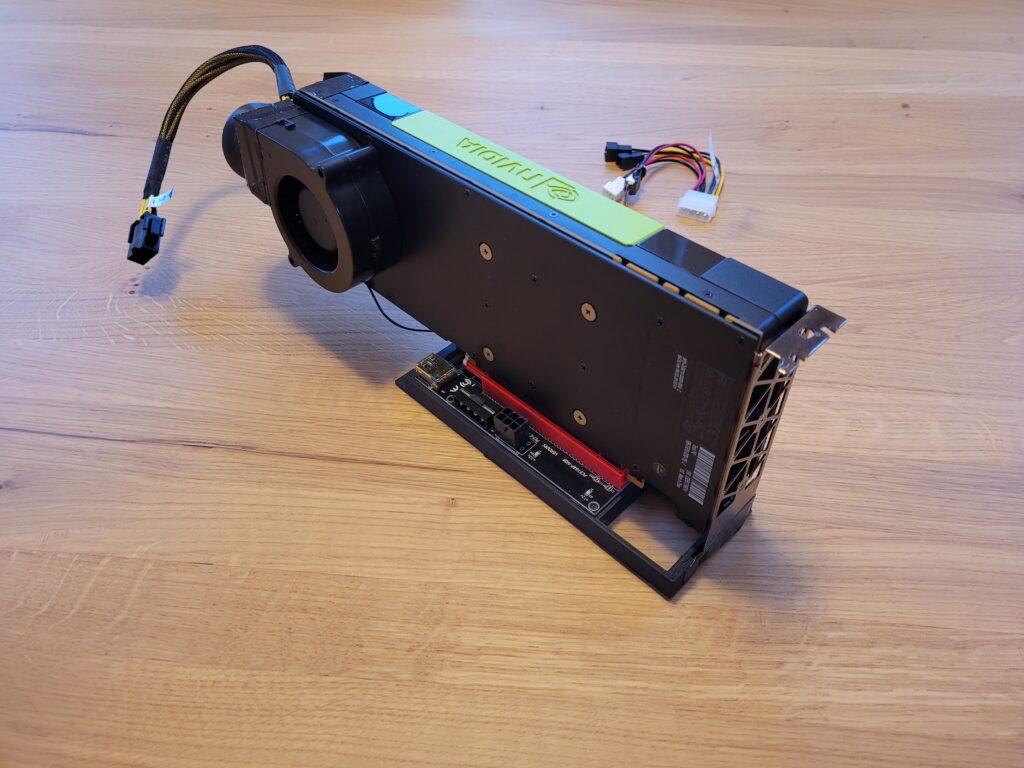
Since the NVIDIA Tesla P40 comes in a full-profile form factor, we needed to acquire a PCIe riser card.
A PCIe riser card, commonly known as a “riser card,” is a hardware component essential in computer systems for facilitating the connection of expansion cards to the motherboard. Its primary role comes into play when space limitations or specific orientation requirements prevent the direct installation of expansion cards into the PCIe slots on the motherboard.
Furthermore, I needed to ensure adequate cooling, but this posed no issue. I utilized a 3D model created by MiHu_Works for a Tesla P100 blower fan adapter, which you can find at this link: Tesla P100 Blower Fan Adapter.
As for the fan, the Titan TFD-B7530M12C served the purpose effectively. You can find it on Amazon: Titan TFD-B7530M12C.
Currently, I am using a single VM with PCIe pass-through. However, it was necessary to implement specific Advanced VM parameters:
pciPassthru.use64bitMMIO = true
pciPassthru.64bitMMIOSizeGB = 64
Now, you might wonder about the performance. It’s outstanding, delivering speeds up to 16x-26x times faster than the CPU. To provide you with an idea of the performance, I conducted a llama-bench test: