Featured

Mastering VMware NSX: Strategies for Success on the VCAP-NV Deploy Exam

The VCAP-NV Deploy exam is one of the most thrilling practical tests that evaluates your efficiency and forces you to work effectively.

“The journey is the destination.”

To prepare efficiently, I highly recommend taking the VMware NSX Troubleshooting and Operations [V4.x] – Deploy course. This course covers:

  • NSX Operations and Tools
  • Troubleshooting the NSX Management Cluster
  • Troubleshooting Infrastructure Preparation
  • Troubleshooting Logical Switching
  • Troubleshooting Logical Routing
  • Troubleshooting Security
  • Troubleshooting the NSX Advanced Load Balancer and VPN Services
  • Datapath Walkthrough

The syllabus thoroughly addresses the scope of the exam.

Review the labs multiple times and after completing the VMware NSX – Deploy course. Useful links:

Focus on the VMware Odyssey HOL Labs that were available at my time: HOL-2426-81-ODY VMware Odyssey – NSX Security Challenge.

Aim to be precise and sufficiently quick.

Exam Content Overview: The exam includes various sections focused on:

Section 4 – Installation, Configuration, and Setup
Objective 4.1 - Prepare VMware NSX-T Data Center Infrastructure
Objective 4.1.1 - Deploy VMware NSX-T Data Center Infrastructure components
Objective 4.1.2 - Configure Management, Control and Data plane components for NSX-T Data Center
Objective 4.1.3 - Configure and Manage Transport Zones, IP Pools, Transport Nodes etc.
Objective 4.1.4 - Confirm the NSX-T Data Center configuration meets design requirements
Objective 4.1.5 - Deploy VMware NSX-T Data Center Infrastructure components in a multi-site
Objective 4.2 - Create and Manage VMware NSX-T Data Center Virtual Networks
Objective 4.2.1 - Create and Manage Layer 2 services
Objective 4.2.2 - Configure and Manage Layer 2 Bridging
Objective 4.2.3 - Configure and Manage Routing including BGP, static routes, VRF Lite and EVPN
Objective 4.3 - Deploy and Manage VMware NSX-T Data Center Network Services
Objective 4.3.1 - Configure and Manage Logical Load Balancing
Objective 4.3.2 - Configure and Manage Logical Virtual Private Networks (VPNs)
Objective 4.3.3 - Configure and Manage NSX-T Data Center Edge and NSX-T Data Center Edge Clusters
Objective 4.3.4 - Configure and Manage NSX-T Data Center Network Address Translation
Objective 4.3.5 - Configure and Manage DHCP and DNS
Objective 4.4 - Secure a virtual data center with VMware NSX-T Data Center
Objective 4.4.1 - Configure and Manage Distributed Firewall and Grouping Objects
Objective 4.4.2 - Configure and Manage Gateway Firewall
Objective 4.4.3 - Configure and Manage Identity Firewall
Objective 4.4.4 - Configure and Manage Distributed IDS
Objective 4.4.5 - Configure and Manage URL Analysis
Objective 4.4.6 - Deploy and Manage NSX Intelligence
Objective 4.5 - Configure and Manage Service Insertion
Objective 4.6 - Deploy and Manage Central Authentication (Workspace ONE access)

Section 5 - Performance-tuning, Optimization, Upgrades
Objective 5.1 - Configure and Manage Enhanced Data Path (N-VDSe)
Objective 5.2 - Configure and Manage Quality of Service (QoS) settings

Section 6 – Troubleshooting and Repairing
Objective 6.1 - Perform Advanced VMware NSX-T Data Center Troubleshooting
Objective 6.1.1 - Troubleshoot Common VMware NSX-T Data Center Installation/Configuration Issues
Objective 6.1.2 - Troubleshoot VMware NSX-T Data Center Connectivity Issues
Objective 6.1.3 - Troubleshoot VMware NSX-T Data Center Edge Issues
Objective 6.1.4 - Troubleshoot VMware NSX-T Data Center L2 and L3 services
Objective 6.1.5 - Troubleshoot VMware NSX-T Data Center Security services
Objective 6.1.6 - Utilize VMware NSX-T Data Center native tools to identify and troubleshoot 

Section 7 – Administrative and Operational Tasks
Objective 7.1 - Perform Operational Management of a VMware NSX-T Data Center Implementation
Objective 7.1.1 - Backup and Restore Network Configurations
Objective 7.1.2 - Monitor a VMware NSX-T Data Center Implementation
Objective 7.1.3 - Manage Role Based Access Control
Objective 7.1.4 - Restrict management network access using VIDM access policies
Objective 7.1.5 - Manage syslog settings
Objective 7.2 - Utilize API and CLI to manage a VMware NSX-T Data Center Deployment
Objective 7.2.1 - Administer and Execute calls using the VMware NSX-T Data Center vSphere API

Each section contains objectives ranging from deploying NSX-T Data Center Infrastructure components to configuring and managing security features like the Distributed Firewall, Gateway Firewall, Identity Firewall, and more. It also covers performance tuning, quality of service settings, advanced troubleshooting, operational management, and using API and CLI for management.

Key Recommendations for Success:

  • Thoroughly study the VMware NSX Documentation to understand the fundamentals and advanced features of NSX.
  • Leverage the VMware NSX Product Page for the latest features and updates.
  • Engage with NSX Hands-On-Labs for practical, hands-on experience.
  • Watch NSX Training and Demo videos on YouTube to visualize configurations and use cases.
  • Prioritize precision and speed in lab exercises to mimic exam conditions.

Wishing you all the best in your preparation and lab endeavors. Let’s dive into the labs and master NSX.
Featured

Mastering Llama-2 Setup: A Comprehensive Guide to Installing and Running llama.cpp Locally

Welcome to the exciting world of Llama-2 models! In today’s blog post, we’re diving into the process of installing and running these advanced models. Whether you’re a seasoned AI enthusiast or just starting out, understanding Llama-2 models is crucial. These models, known for their efficiency and versatility in handling large-scale data, are a game-changer in the field of machine learning.

In this Shortcut, I give you a step-by-step process to install and run Llama-2 models on your local machine with or without GPUs by using llama.cpp. As I mention in Run Llama-2 Models, this is one of the preferred options.

Here are the steps:

Step 1. Clone the repositories

You should clone the Meta Llama-2 repository as well as llama.cpp:

$ git clone https://github.com/facebookresearch/llama.git
$ git clone https://github.com/ggerganov/llama.cpp.git 

Step 2. Request access to download Llama models

Complete the request form, then navigate to the directory where you downloaded the GitHub code provided by Meta. Run the download script, enter the key you received, and adhere to the given instructions:

$ cd llama
$ ./download 

Step 3. Create a virtual environment

To prevent any compatibility issues, it’s advisable to establish a separate Python environment using Conda. In case Conda isn’t already installed on your system, you can refer to this installation guide. Once Conda is set up, you can create a new environment by entering the command below:

#https://docs.conda.io/projects/miniconda/en/latest/

#These four commands quickly and quietly install the latest 64-bit version #of the installer and then clean up after themselves. To install a different #version or architecture of Miniconda for Linux, change the name of the .sh #installer in the wget command.

mkdir -p ~/miniconda3
wget https://repo.anaconda.com/miniconda/Miniconda3-latest-Linux-x86_64.sh -O ~/miniconda3/miniconda.sh
bash ~/miniconda3/miniconda.sh -b -u -p ~/miniconda3
rm -rf ~/miniconda3/miniconda.sh

#After installing, initialize your newly-installed Miniconda. The following #commands initialize for bash and zsh shells:

~/miniconda3/bin/conda init bash
~/miniconda3/bin/conda init zsh
$ conda create -n llamacpp python=3.11

Step 4. Activate the environment

Use this command to activate the environment:

$ conda activate llamacpp

Step 5. Go to llama.cpp folder and Install the required dependencies

Type the following commands to continue the installation:

$ cd ..
$ cd llama.cpp
$ python3 -m pip install -r requirements.txt

Step 6.

Compile the source code

Option 1:

Enter this command to compile with only CPU support:

$ make 

Option 2:

To compile with CPU and GPU support, you need to have the official CUDA libraries from Nvidia installed.

#https://developer.nvidia.com/cuda-12-3-0-download-archive?target_os=Linux&target_arch=x86_64&Distribution=Ubuntu&target_version=22.04&target_type=deb_local

wget https://developer.download.nvidia.com/compute/cuda/repos/ubuntu2204/x86_64/cuda-ubuntu2204.pin

sudo mv cuda-ubuntu2204.pin /etc/apt/preferences.d/cuda-repository-pin-600

wget https://developer.download.nvidia.com/compute/cuda/12.3.0/local_installers/cuda-repo-ubuntu2204-12-3-local_12.3.0-545.23.06-1_amd64.deb

sudo dpkg -i cuda-repo-ubuntu2204-12-3-local_12.3.0-545.23.06-1_amd64.deb

sudo cp /var/cuda-repo-ubuntu2204-12-3-local/cuda-*-keyring.gpg /usr/share/keyrings/

sudo apt-get update

sudo apt-get -y install cuda-toolkit-12-3

sudo apt-get install -y cuda-drivers

Double check that you have Nvidia installed by running:

$ nvcc --version
$ nvidia-smi

Export the the CUDA Home environment variable:

$ export CUDA_HOME=/usr/lib/cuda

Then, you can launch the compilation by typing:

$ make clean && LLAMA_CUBLAS=1 CUDA_DOCKER_ARCH=all make -j

Step 7. Perform a model conversion

Run the following command to convert the original models to f16 format (please note in the example I show examples the 7b-chat model / 13b-chat model / 70b-chat model):

$ mkdir models/7B
$ python3 convert.py --outfile models/7B/ggml-model-f16.gguf --outtype f16 ../llama/llama-2-7b-chat --vocab-dir ../llama/llama

$ mkdir models/13B
$ python3 convert.py --outfile models/13B/ggml-model-f16.gguf --outtype f16 ../llama/llama-2-13b-chat --vocab-dir ../llama/llama

$ mkdir models/70B
$ python3 convert.py --outfile models/70B/ggml-model-f16.gguf --outtype f16 ../llama/llama-2-70b-chat --vocab-dir ../llama/llama

If the conversion runs successfully, you should have the converted model stored in models/* folders. You can double check this with the ls command:

$ ls models/7B/ 
$ ls models/13B/ 
$ ls models/70B/ 

Step 8. Quantize

Now, you can quantize the model to 4-bits, for example, by using the following command (please note the q4_0 parameter at the end):

$ ./quantize models/7B/ggml-model-f16.gguf models/7B/ggml-model-q4_0.gguf q4_0 

$ ./quantize models/13B/ggml-model-f16.gguf models/13B/ggml-model-q4_0.gguf q4_0 

$ ./quantize models/70B/ggml-model-f16.gguf models/70B/ggml-model-q4_0.gguf q4_0 
$ ./quantize models/70B/ggml-model-f16.gguf models/70B/ggml-model-q2_0.gguf Q2_K
$ ./quantize -h
usage: ./quantize [--help] [--allow-requantize] [--leave-output-tensor] [--pure] model-f32.gguf [model-quant.gguf] type [nthreads]

  --allow-requantize: Allows requantizing tensors that have already been quantized. Warning: This can severely reduce quality compared to quantizing from 16bit or 32bit
  --leave-output-tensor: Will leave output.weight un(re)quantized. Increases model size but may also increase quality, especially when requantizing
  --pure: Disable k-quant mixtures and quantize all tensors to the same type

Allowed quantization types:
   2  or  Q4_0   :  3.56G, +0.2166 ppl @ LLaMA-v1-7B
   3  or  Q4_1   :  3.90G, +0.1585 ppl @ LLaMA-v1-7B
   8  or  Q5_0   :  4.33G, +0.0683 ppl @ LLaMA-v1-7B
   9  or  Q5_1   :  4.70G, +0.0349 ppl @ LLaMA-v1-7B
  10  or  Q2_K   :  2.63G, +0.6717 ppl @ LLaMA-v1-7B
  12  or  Q3_K   : alias for Q3_K_M
  11  or  Q3_K_S :  2.75G, +0.5551 ppl @ LLaMA-v1-7B
  12  or  Q3_K_M :  3.07G, +0.2496 ppl @ LLaMA-v1-7B
  13  or  Q3_K_L :  3.35G, +0.1764 ppl @ LLaMA-v1-7B
  15  or  Q4_K   : alias for Q4_K_M
  14  or  Q4_K_S :  3.59G, +0.0992 ppl @ LLaMA-v1-7B
  15  or  Q4_K_M :  3.80G, +0.0532 ppl @ LLaMA-v1-7B
  17  or  Q5_K   : alias for Q5_K_M
  16  or  Q5_K_S :  4.33G, +0.0400 ppl @ LLaMA-v1-7B
  17  or  Q5_K_M :  4.45G, +0.0122 ppl @ LLaMA-v1-7B
  18  or  Q6_K   :  5.15G, -0.0008 ppl @ LLaMA-v1-7B
   7  or  Q8_0   :  6.70G, +0.0004 ppl @ LLaMA-v1-7B
   1  or  F16    : 13.00G              @ 7B
   0  or  F32    : 26.00G              @ 7B
          COPY   : only copy tensors, no quantizing

Step 9. Run one of the prompts

Option 1:

You can execute one of the example prompts using only CPU computation by typing the following command:

$ ./main -m ./models/7B/ggml-model-q4_0.gguf -n 1024 --repeat_penalty 1.0 --color -i -r "User:" -f ./prompts/chat-with-bob.txt

This example will initiate the chat in interactive mode in the console, starting with the chat-with-bob.txt prompt example.

Option 2:

If you compiled llama.cpp with GPU enabled in Step 8, then you can use the following command:

$ ./main -m ./models/7B/ggml-model-q4_0.gguf -n 1024 --repeat_penalty 1.0 --color -i -r "User:" -f ./prompts/chat-with-bob.txt --n-gpu-layers 3800

$ ./main -m ./models/13B/ggml-model-q4_0.gguf -n 1024 --repeat_penalty 1.0 --color -i -r "User:" -f ./prompts/chat-with-bob.txt --n-gpu-layers 3800

$ ./main -m ./models/70B/ggml-model-q4_0.gguf -n 1024 --repeat_penalty 1.0 --color -i -r "User:" -f ./prompts/chat-with-bob.txt --n-gpu-layers 1000

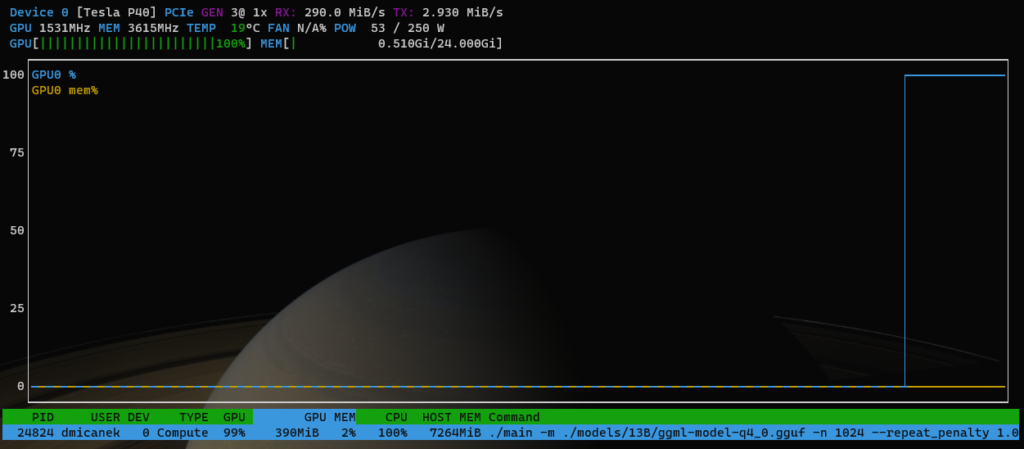
If you have GPU enabled, you need to set the number of layers to offload to the GPU based on your vRAM capacity. You can increase the number gradually and check with the nvtop command until you find a good spot.

You can see the full list of parameters of the main command by typing the following:

$ ./main --help

Private AI: One Year Later with Chris Wolf

Private AI: One Year Later with Chris Wolf

Private AI: One Year Later with Chris Wolf

On this episode of the Virtually Speaking Podcast we welcome Chris Wolf, Global Head of AI and Advanced Services, VMware Cloud Foundation Division, Broadcom to discuss Private AI and what has changed since the announcement last year.


Broadcom Social Media Advocacy

First Look at VMware Cloud Foundation 9

First Look at VMware Cloud Foundation 9

First Look at VMware Cloud Foundation 9

The big news from last week at VMware Explore Las Vegas was the announcement of VMware Cloud Foundation (VCF) 9! For those that attended the VCF Division Keynote 3 Transformations for the Smarter Way to Cloud, you got to hear more about VCF 9 directly from both Krish Prasad (General Manager of VCF Division) and […]


Broadcom Social Media Advocacy

On-Demand session URLs for VMware Explore Las…

On-Demand session URLs for VMware Explore Las Vegas 2024

On-Demand session URLs for VMware Explore Las…

VMware Explore Las Vegas 2024 officially wraps up today! I thoroughly enjoyed the event and had fantastic conversations with customers, partners and colleague! The VMware Explore team has already been hard at work in getting all sessions published into the free on-demand catalog, which is available for or EVERYONE to watch, but also new this […]


Broadcom Social Media Advocacy

Announcing New Capabilities Coming to VMware…

Announcing New Capabilities Coming to VMware…

With the announcement at VMware Explore 2023 in Las Vegas of VMware Private AI with NVIDIA, Broadcom and NVIDIA created a vision of an enterprise-grade, robust generative AI solution focused on privacy, choice, flexibility, performance, and security for our enterprise customers. Today, […]


Broadcom Social Media Advocacy

Introducing VMware Cloud Foundation 9

Introducing VMware Cloud Foundation 9

At VMware Explore 2024 in Las Vegas we are introducing VMware Cloud Foundation 9 – a significant leap forward that will streamline the transition from siloed IT environments to a unified, integrated private cloud platform. VMware Cloud Foundation 9 will make the deployment, consumption, and […]


Broadcom Social Media Advocacy

Quick Tip – vCenter Server Advanced Settings…

Quick Tip – vCenter Server Advanced Settings…

Simliar to my ESXi Advanced and Kernel Settings reference, I was recently asked about creating one for vCenter Server to capture all the default out of the box advanced settings. With some automation in place, I deployed all major releases of the vCenter Server Appliance (VCSA) from 6.7 to 8.0 […]


Broadcom Social Media Advocacy

Introducing the vSphere GPU Monitoring Fling

Introducing the vSphere GPU Monitoring Fling

With the explosion of use cases in Generative AI, along with existing AI and ML workloads, everyone wants more GPUs and to maximize their usage of the ones they have. Today, GPU usage metrics are available only at the host level in vSphere, and with this Fling you can now see them at the Cluster …Read More


Broadcom Social Media Advocacy