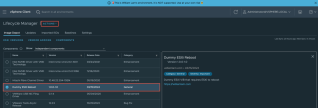
A few weeks back, I had a request from one of our Technical Adoption Managers (TAM) that their customer wanted to create a custom ESXi VIB that could be used with vSphere Lifecycle Manager (vLCM) and would only require the ESXi host to reboot as part of the remediation. This might sound like […]
ESXi Scripted Installation (Kickstart) has been my go-to method for achieving zero-touch provisioning of ESXi hosts at scale, which I had started using back in the ESX 2.5 days when I was a customer! Having worked at some very larger enterprises, I got the opportunity to experience and manage […]
vCLS VMs can’t be pinned away from one host. Options: restrict vCLS datastores, use an anti-affinity policy, or disable vCLS with Retreat Mode.
Short answer: vSphere has no setting that keeps vCLS VMs off one specific host, such as a dedicated vSphere HA failover host. The practical options are indirect: limit External vCLS to datastores that the failover host cannot see, or take vCLS out of the cluster with Retreat Mode. On vSphere 9.0 and later, Retreat Mode has no impact on DRS or HA, so it is usually the cleanest answer. On 7.0 and 8.0 it stops DRS.
Why vCLS VMs end up on the failover host
vSphere Cluster Services (vCLS) runs small agent VMs in each cluster so DRS keeps working even when vCenter is down. vCenter places them on hosts in the cluster by itself. With the Dedicated failover hosts admission control policy, you want that host to stay empty until a failure happens, and a vCLS VM sitting there looks like a policy violation and makes capacity reports harder to read. If you need a refresher on vCLS itself, see Introduction to vSphere Clustering Service (vCLS).
Yes, if the failover host has no access to those datastores
Needs storage the failover host can’t see. If only the failover host survives, vCLS can’t start there and DRS stops. Applies to External vCLS only.
vCLS VM anti-affinity compute policy
No
Keeps vCLS away from tagged VMs, not hosts
Retreat Mode
Yes, vCLS VMs are removed
7.0/8.0: DRS stops and HA placement is not optimal. 9.0+: no impact on DRS or HA
The datastore approach works because a VM can only run on a host that sees its datastore. Broadcom documents the allowed-datastores setting in External vCLS Datastore Placement. The anti-affinity policy (see vCLS VM Anti-Affinity Policies) is useful when you want critical workloads and vCLS on different hosts, but it can’t target a host.
Embedded vCLS in 8.0 Update 3 and later
When both vCenter and ESXi run 8.0 U3 or later, vCLS switches to Embedded vCLS. You get two VMs per cluster instead of three, and when a host is evacuated its vCLS VM is destroyed and recreated on another host instead of being migrated. The datastore trick is documented only for External vCLS, so on Embedded vCLS Retreat Mode is the lever that works.
Which option to pick
vSphere 9.0 or later: use Retreat Mode. Broadcom states that on 9.0 vCLS can be disabled with no impact on DRS or HA. The 9.0 docs also mark vCLS as deprecated.
vSphere 7.0 / 8.0 with External vCLS: if you can present a datastore to every host except the failover host, restrict vCLS to it. If you can’t, accept that vCLS may run on the failover host. The VMs are small.
vSphere 7.0 / 8.0, Retreat Mode: use it only for a short maintenance task. DRS doesn’t work while it is on.
Why vCLS VMs fail to power on (cpuid.mwait, per-VM EVC, vhv.enable, privileges, datastore) and the Broadcom KB fix for each error.
Short answer: When vCLS VMs refuse to power on, the error text usually points to the cause. “No host is compatible with the virtual machine” with cpuid.mwait in the details means the host CPU does not expose MONITOR/MWAIT, which the per-VM EVC baseline of vCLS VMs requires. Enable it in the server BIOS (or fix the nested ESXi VM configuration in labs), then cycle Retreat Mode so vCenter redeploys fresh vCLS VMs. Other causes are nested virtualization flags, privileges and resource or datastore problems.
Open the failed power-on task in the vSphere Client and expand the details, or check vmware.log of the vCLS VM. The detail line tells you which of these applies.
Error / detail
Cause
Broadcom KB
No host is compatible with the virtual machine; Feature ‘cpuid.mwait’ was 0, but must be 1
MONITOR/MWAIT disabled or hidden by the host firmware
Insufficient resources on a single-host cluster after a vCenter restore
Stale vCLS state after the restore
410905
Feature ‘bad_requirement:hv.capable’ was 0, but must be at least 1
vhv.enable = true set host-wide in /etc/vmware/config
344779
Privilege check failed for user VSPHERE.LOCAL\vpxd-extension-…
Solution users have excessive group memberships
316318
Can’t provision VM for ClusterAgent due to lack of suitable datastore
EAM keeps retrying a datastore that is no longer suitable
423594
Fix: “No host is compatible” and cpuid.mwait
vCLS VMs are deployed with a per-VM EVC mode that expects the cpuid.mwait flag. If the host firmware hides MONITOR/MWAIT, DRS cannot find a host that meets the VM’s CPU requirements, and every power-on attempt fails.
Place the host in maintenance mode and reboot into BIOS/UEFI setup.
Enable the Monitor/MWAIT option in the CPU or power-management section. KB 390674 also recommends updating outdated BIOS firmware and setting C-States to the vendor’s recommended (“autonomous”) value.
Boot ESXi and exit maintenance mode. Repeat for every host in the cluster.
Put the cluster into Retreat Mode, wait for the vCLS VMs to be removed, then set it back to normal. vCenter deploys new vCLS VMs that pick up the corrected CPU features.
To check the flag from the ESXi shell, KB 395205 uses esxcfg-info. Look at the ECX value of CPUID leaf 1. If the last hex digit is f, MWAIT is exposed.
esxcfg-info | less
# search for "CPUID 1" and check the ECX register value
If you cannot change the BIOS right away, KB 326217 describes a workaround (ESXi 6.7 or later): upgrade the vCLS VM compatibility to hardware version 14, which makes the per-VM EVC setting editable on the VM’s Configure tab. Then disable EVC for each vCLS VM until it powers on. Treat this as temporary. The BIOS change is the real fix.
Nested ESXi and VCF Holodeck labs
Nested hosts often expose a reduced CPUID set, so the same MWAIT error shows up in labs built with Holodeck or similar toolkits. William Lam (linked below) fixed it with the hardware version 14 plus per-VM EVC step described above. He later traced it to the guest OS type configured for the nested ESXi VMs. For lab-only setups, check that the nested ESXi VMs use the correct ESXi guest OS type before touching vCLS.
The reverse problem happens on physical hosts. If someone enabled nested hardware virtualization host-wide with vhv.enable = true in /etc/vmware/config, vCLS fails with bad_requirement:hv.capable. KB 344779 resolves it by commenting out or removing that line and restarting the host. Only do this on hosts that are not meant to run nested hypervisors.
Other causes and fixes
Privilege check failed for vpxd-extension: KB 316318 provides a fixAdministratorsGroup script. Take an offline snapshot of vCenter (all linked vCenters in ELM) first, run the script in check mode, then in fix mode.
Insufficient resources after a vCenter restore (KB 410905): cycle Retreat Mode to regenerate the vCLS VMs.
No suitable datastore (KB 423594): cycle Retreat Mode so EAM re-evaluates placement against the currently healthy shared datastores. On Supervisor (Workload Management) clusters, the KB says to fix the underlying datastore issue instead.
ESXi 8.0 U3 embedded vCLS: if Cluster Services shows Unhealthy, check the Infravisor service on each host (KB 386044).
/etc/init.d/infravisor status
/etc/init.d/infravisor start
After any fix, confirm that all vCLS VMs are powered on and that the cluster summary no longer reports impaired DRS or HA.
NSX remote logging not configured? Set a syslog server on NSX Manager and Edge with set logging-server, check it with get logging-servers, find local logs.
Short answer: if NSX reports that remote logging is not configured, or you simply want central logs, point each component at your syslog server. On NSX Manager run set logging-server <IP/FQDN:port> proto udp level info, on NSX Edge the same with proto tcp, and check with get logging-servers. ESXi hosts log NSX events to /var/log/nsx-syslog.log, so forward those through the host’s own syslog settings. All set logging-server options and the other NSX CLI commands per version are in the NSX CLI interactive mindmap.
This blog post delves into the configuration of NSX components for remote Syslog transfer, a critical step in centralizing log management and enhancing network visibility.
Local Logging on NSX Components
By default, NSX components store logs locally, which can be accessed in privileged mode. These logs are crucial for troubleshooting and auditing purposes, offering insights into the system’s operations and potential issues. The default storage location for these logs is the /var/log directory. Here’s a quick overview of the log files and their locations for various NSX components:
NSX Manager: Logs are stored in /var/log/syslog, /var/log/proton/nsxapi.log, and /var/log/nsx-audit.log
NSX Edge: The primary log file is located at /var/log/syslog.
NSX Controller: Logs can be found in /var/log/cloudnet/nsx-ccp.log.
ESXi Host: Logs are stored in /var/log/nsx-syslog.log.
Configuring Remote Logging
To leverage the full potential of logging, configuring NSX components to transfer logs to a remote Syslog server is advisable. This allows for centralized log management, making it easier to monitor and analyze the logs from various components in a single location. Here are the commands to configure logging to a remote Syslog server for different NSX components:
NSX Manager:
Set command: set logging-server <IP Address/fqdn:Port> proto udp level info
Verify command: get logging-servers
NSX Edge:
Set command: set logging-server <IP Address/fqdn:Port> proto tcp level info
Verify command: get logging-servers
These commands should be executed with the appropriate IP address, fully qualified domain name (FQDN), and port of your Syslog server, alongside the protocol and log level specified. The choice between TCP and UDP protocols depends on your requirements for log delivery confirmation and network overhead. Generally, TCP is used when acknowledgment of log receipt is required, while UDP is used for lower network overhead.
Essential NSX commands on NSX Manager and ESXi: transport node status, TEP/VTEP info, VIFs, NSX VIBs and agents, vmkping over the TEP stack, and log files.
Short answer: the NSX commands you need most are get transport-nodes status, get transport-node <uuid> vtep and get transport-node <uuid> vifs on NSX Manager; on the ESXi host, esxcli software vib list | grep nsx, vmkping ++netstack=vxlan for TEP connectivity, and esxcli network ip connection list to check the agent connections (port 1234 to NSX Manager, 1235 to the controllers). The log files to watch are listed at the end.
The NSX Manager is the centralized network management component of VMware NSX, offering an intuitive interface for managing the network and security settings across your virtual environment. Below are key commands you can run from the NSX Manager CLI:
List all ESXi hosts to get the Transport Node UUIDs: To view all ESXi hosts registered with NSX, and their respective Transport Node UUIDs, use get transport-nodes status This command is vital for identifying nodes for further configuration or troubleshooting.
List the Transport Node Status: To check the status of a specific Transport Node, use get transport-node <uuid> status. This command provides insights into the health and connectivity status of the node.
List the Transport Node VTEP Information: View the VXLAN Tunnel Endpoint (VTEP) information with get transport-node <uuid> vtep. This is crucial for understanding the overlay network configuration.
Lists the VIF UUID of a VM: To find the Virtual Interface (VIF) UUID of a VM connected to a Segment on a Transport Node, use get transport-node <uuid> vifs This command is useful for troubleshooting VM connectivity issues.
Commands Run from ESXi Host
Directly interacting with ESXi hosts is sometimes necessary for detailed troubleshooting or configuration. Here are commands specific to NSX that you can run on ESXi hosts:
List the VIBs installed on ESXi: To see all NSX-installed VMware Installation Bundles (VIBs) on an ESXi host, use esxcli software vib list | grep nsx.
List all the NSX modules currently loaded in the system: Check which NSX modules are active with esxcli system module list | grep nsx.
Check the User World Agents (UWA) Status: For nsx-mpa, nsx-proxy, and nsx-opsagent, use /etc/init.d/nsx-<agent> status to verify if these agents are running correctly. When a host shows Down or Host Disconnected in NSX, see troubleshooting NSX host agents.
Check UWAs Connection: Use esxcli network ip connection list | grep <port number> to check connections to the NSX Controllers (Port 1235) and NSX Manager (Port 1234).
ESXi Host Networking Commands
Network configuration and troubleshooting directly on ESXi hosts are facilitated by the following commands:
List Physical NICs/vmnic: esxcli network nic list gives a summary of all physical NICs.
Physical NIC Details: Use esxcli network nic get -n <vmnic-id> for detailed information about a specific NIC.
List vmk NICs: For IP addresses, MAC, MTU, and other details, use esxcli network ip interface ipv4 get.
Details of vxlan IP Stack: To view the VXLAN-dedicated IP stack configuration, use esxcli network ip interface list --netstack=vxlan.
Ping from a VXLAN TCP/IP Stack: vmkping ++netstack=vxlan x.x.x.x allows testing connectivity using the VXLAN stack.
View VXLAN-dedicated TCP/IP Stack’s Routing and ARP Tables: Use esxcli network ip route ipv4 list -N vxlan and esxcli network ip neighbor list -N vxlan respectively.
NSX Installation Log Files
Troubleshooting NSX installations requires access to specific log files:
On NSX Manager:
View Log Files: Use get log-file manager.log follow or get log-file syslog follow to tail the NSX Manager logs in real-time.
On ESXi Hosts:
Installation and Host-related Logs: Located at /var/log/esxupdate.log for installation activities, /var/log/vmkernel.log for host issues, and /var/log/vmksummary.log, /var/log/vmkwarning.log for VMkernel warnings and messages. Module load failures are captured in /var/log/syslog.log.
Manage the NSX Manager cluster from the CLI: cluster status and config, detach and join manager nodes, and the NSX Manager log files for troubleshooting.
Short answer: check NSX Manager cluster health with get cluster status and its setup with get cluster config. Remove a manager with detach node <ID>, and add one with join <primary-IP> cluster-id <ID> thumbprint <thumbprint> username admin password <password>. The log files to read when something breaks are listed at the end. Every other NSX Manager command, by NSX version, is in the NSX CLI interactive mindmap.
This blog post dives into the essential commands for managing the NSX Management Cluster and explores the key log files within the NSX Manager to ensure you’re equipped to maintain and troubleshoot your setup effectively.
Understanding the NSX Management Cluster
Essential Commands for NSX Management Cluster
To help you navigate the management of the NSX Management Cluster, here are some indispensable commands you should be familiar with:
Querying Cluster Status
Command: get cluster status
Description: This command allows you to check the current status of the NSX management cluster, providing insights into its health and operational state.
Querying Cluster Configuration
Command: get cluster config
Description: Use this command to obtain the configuration details of the NSX management cluster. It’s essential for verifying the current setup and planning any necessary adjustments.
Detaching a Manager Node
Command: detach node <ID>
Description: If you need to remove a Manager node from the cluster, this command lets you safely detach it, ensuring no disruption to the cluster’s operation.
Description: This command is crucial for scaling or repairing the NSX management cluster. It allows you to add a new Manager node to the cluster, enhancing its resilience and capacity.
Key Log Files in NSX Manager
For effective troubleshooting and monitoring of the NSX Management Cluster, understanding how to access and interpret log files is crucial. Here are the essential log files within the NSX Manager:
NSX Manager Logs
Access Command: get log-file manager.log follow
Location & Description: This log provides detailed records of the operations and events within the NSX Manager, offering invaluable insights for troubleshooting.
Syslog Files
Access Command: get log-file syslog follow
Location & Description: The syslog files capture a wide range of system messages, including errors, warnings, and operational information, which are critical for diagnosing issues within the cluster.
NSX DFW from the CLI: firewall status, rule summary and exclude list on NSX Manager, per-host checks on ESXi, DFW log files and gateway firewall on Edge.
Short answer: the NSX Distributed Firewall commands you’ll use most are get firewall status, get firewall summary and get firewall exclude-list on NSX Manager, then the per-host checks on ESXi (the data plane that enforces the rules), the DFW log files, and the gateway firewall commands on NSX Edge. Each is described below; all other firewall commands per NSX version and node type are in the NSX CLI interactive mindmap.
This blog post aims to elucidate the essential command-line interface (CLI) commands for managing the NSX Distributed Firewall, focusing on commands that can be executed from the NSX Manager and ESXi hosts, as well as detailing relevant log files for troubleshooting and auditing purposes. Additionally, we’ll touch upon commands for managing gateway firewall settings on NSX Edge devices.
NSX Manager: The Central Control Plane
The NSX Manager serves as the centralized control plane for managing NSX environments, offering a unified interface for configuring and monitoring network virtualization and security settings. Here are some key CLI commands you can run directly from the NSX Manager:
View the Rule Count of L2, L3 Firewall Rules: To get a summary of Layer 2 and Layer 3 firewall rules, use the command get firewall summary This command provides a quick overview of the rules in place, helping administrators gauge the extent of their firewall configurations.
List of Firewall Entities in the Excluded List: To view the entities excluded from firewall protection, execute get firewall exclude-list This command is crucial for identifying assets that are intentionally bypassed by firewall rules for specific purposes.
Firewall Status: Checking the overall status of the firewall is as simple as running get firewall status This command confirms whether the distributed firewall is operational and can help in troubleshooting connectivity issues.
ESXi Hosts: The Data Plane
ESXi hosts, where VMs reside, are integral to enforcing NSX DFW rules. The following CLI commands can be run on ESXi hosts to manage and troubleshoot DFW settings at the host level:
List All the VMs dvFilter Names: Use summarize-dvfilter to list all dvFilters associated with VMs. dvFilters are kernel modules that apply firewall rules to VMs’ network traffic.
View IP and MAC Addresses for a dvFilter: To see the IP and MAC addresses related to a specific dvFilter, the command is vsipioctl getaddrsets -f <dvfilter-name>
List the Firewall Rules Applied on DvFilter: Retrieve the set of firewall rules applied to a dvFilter by executing vsipioctl getrules -f <dvfilter-name>
View Firewall Configuration for a dvFilter: To inspect the firewall configuration for a specific dvFilter, the command is vsipioctl getfwconfig -f <dvfilter-name>
Log Files: The Insight Tools
Log files play a pivotal role in monitoring, troubleshooting, and auditing. Here are essential log file locations for NSX components:
NSX Syslog Log File on ESXi: Located at /var/log/nsx-syslog.log, this file captures a wide range of NSX-related events and is invaluable for troubleshooting.
Gateway Firewall: NSX Edge Commands
NSX Edge devices provide gateway services, including firewalling for north-south traffic. Here’s how to manage gateway firewall settings via CLI:
Query Interfaces with Firewall Rules: get firewall interfaces lists all edge interfaces with configured firewall rules.
Query Gateway Firewall Rules: For specific interface rules, use get firewall <interface-uuid> ruleset rules
NSX logical routing troubleshooting from the CLI: gateways, interfaces and routes on NSX Manager, BGP and OSPF on the Edge (vrf), and checks on ESXi hosts.
Short answer: to troubleshoot NSX routing, start on NSX Manager with get gateways, get gateway <uuid> interfaces and get gateway <uuid> route. Then go to the Edge node, enter the Tier-0 service router with vrf <ID>, and check get bgp neighbor or the OSPF equivalents. Finish on the ESXi host to confirm what the distributed router actually programmed. All commands are listed below; for every other NSX CLI command (all gateway, BGP and OSPF variants by version), see the NSX CLI interactive mindmap.
This blog post delves into the logical routing capabilities of NSX-T and how network administrators can harness the power of NSX Manager and Edge CLI commands to efficiently manage and troubleshoot their network infrastructure.
NSX Manager: Your Gateway to Network Management
NSX Manager serves as the centralized network management console in VMware’s NSX-T architecture. From listing gateways to viewing detailed route information, NSX Manager equips administrators with the tools they need to manage their network effectively.
Key Commands from NSX Manager:
List All Gateways: Easily view all the gateways within your network with get gateways
Gateway Details: For specifics about a gateway, use get gateway <uuid>
Interface Management: View a gateway’s interfaces using get gateway <uuid> interfaces and get detailed interface information with get gateway <uuid> interface <interface-id>
Routing Information: Access route details on a gateway with get gateway <uuid> route
NSX Edge Node Status: Check the status of NSX Edge nodes registered with the NSX Manager using get transport-node status
Edge CLI: Deep Dive into Gateway Diagnostics
The Edge CLI is your go-to for an in-depth analysis and diagnostics of gateways. Whether you’re monitoring gateway statistics or reviewing BGP and OSPF configurations, the Edge CLI commands offer a granular view of network operations.
View the gateway BGP information:
Gateway Overview: get gateways provides a list of all gateways.
To enter into the VRF construct: vrf <ID>
View the bgp neighbor of a Tier-0 SR: (Tier-0)> get bgp neighbor
View the interfaces on a Tier-0 SR: (Tier-0)> get interfaces
View the forwarding table: (Tier-0)> get forwarding
View the Routes: (Tier-0)> get route
View the BFG configuration: (Tier-0)> get bfd-config
View the gateway OSPF information
To enter into the VRF construct: vrf <ID>
View the bgp neighbor of a Tier-0 SR: (Tier-0)> get ospf neighbor
View the details of the OSPF interface: (Tier-0)> get ospf interface
View the forwarding table: (Tier-0)> get forwarding
View the Routes: (Tier-0)> get route
View the OSPF database: (Tier-0)> get ospf database
Statistics and Neighbors: Use get gateway <uuid> stats for statistics and get gateway <uuid> neighbor to view neighbor details.
BGP and OSPF Configurations: Enter the VRF construct with vrf <ID> to view BGP neighbors, OSPF interfaces, and routing information.
ESXi Host-Level Insights
At the ESXi host level, NSX-T extends its capabilities to provide essential diagnostics and log file access, ensuring administrators have all the necessary tools at their fingertips.
Commands Run from ESXi:
Forwarding Table and Interfaces: View the gateway’s forwarding table and interfaces with get gateway <UUID> forwarding and get gateway <UUID> interfaces.
Neighbors: To see a gateway’s neighbors, use get gateway <UUID> neighbors.
Log Files on ESXi:
NSX Syslog Log File: Located at /var/log/nsx-syslog.log, this log file is critical for troubleshooting and understanding the events within your NSX environment.
NSX segment commands on NSX Manager and ESXi: list segments, MAC, ARP, VTEP and transport-node tables, port details, stats, and the ESXi logs to check.
Short answer: for NSX segments (logical switches), the key commands are get segments, get segment <vni-or-uuid> mac-table, arp-table, vtep and transport-node-table on NSX Manager, plus the same get segments views in nsxcli on the ESXi host. The ESXi commands and log files for deeper troubleshooting are listed below. Every segment command with its options, filterable by Manager, Edge or ESXi, is in the NSX CLI interactive mindmap.
Understanding the command-line interface (CLI) commands for logical switching is crucial for VCAP-NV Deploy Exam. This guide provides an overview of essential CLI commands for managing logical switches, segments, and related components from both the NSX Manager and ESXi hosts.
Commands Run from NSX Manager (nsxcli)
1. Managing Segments
Segments in NSX-T are logical constructs that define Layer 2 broadcast domains, similar to VLANs in traditional networking.
List All Segments: To view all configured segments, use get segments
List All Switch Ports Connected to a Segment: View ports with get segment <uuid> ports
Segment Information: For details on a specific segment, use get segment <vni-or-uuid>
ARP Table: View the ARP table of a segment with get segment <vni-or-uuid> arp-table
MAC Table: To see the MAC address table, use get segment <vni-or-uuid> mac-table
Segment Statistics: For segment traffic statistics, use get segment <vni-or-uuid> stats
Transport Node Table: List transport nodes part of a segment with get segment <vni-or-uuid> transport-node-table
VTEP Table: View VTEP information with get segment <vni-or-uuid> vtep
Segment Port Information: To inspect a segment port, use get segment-port <uuid>
Segments Statistics: For aggregated statistics of all segments, get segments stats.
Commands Run from ESXi (nsxcli)
Viewing Segment Information and Tables on ESXi
All Segments:get segments lists all segments accessible from the ESXi host.
Segment Information: Use get segment <logical-switch-id> for segment details.
ARP Table: Access a segment’s ARP table with get segment <vni-or-uuid> arp-table
MAC Table: View the MAC table via get segment <vni-or-uuid> mac-table
ND Table: To see the ND table, get segment <vni-or-uuid> nd-table
VTEP Table: For VTEP details, get segment <vni-or-uuid> vtep-table
Segment Port Status: Check the status of segment ports with get segment-port status
Tables Using VNI: To access MAC, ARP, VTEP tables using VNI, get segment {local | remote} {mac-cache | arpcache | vtep-cache} <vni>
Tunnel Status: Verify transport node tunnel status with get host-switch <host-switch-name> tunnels
ESXi Commands for Network Insights
Insights and Performance Monitoring
Switch Port ID: View switch port IDs using net-stats -l
Configured Switches: List switches with esxcfg-vswitch -l
VTEP and VNI Configuration:net-vdl2 -l shows VTEP and VNI config
VDS Uplinks Configuration: For uplink configuration, net-vdr -C -l
View Gateways: List gateways with net-vdr -I -l
Verify VXLAN Module: Check VXLAN kernel module with esxcli system module get -m vdl2
Performance Monitoring: Utilize esxtop for monitoring performance.
Log Files on ESXi
Troubleshooting and Logs
ESXi Host hostd Log File: Accessible at /var/log/hostd.log
NSX Syslog Log File: Located at /var/log/nsx-syslog.log
Understanding and utilizing these commands efficiently can significantly enhance the management and troubleshooting of your NSX-T environment. Whether you’re a seasoned network professional or new to VMware NSX, mastering these commands is a step towards ensuring a robust, efficient virtual networking infrastructure.