Daniel Micanek virtual Blog – Like normal Dan, but virtual.
Category: ESXi
The “ESXi” blog category focuses on VMware ESXi, a bare-metal hypervisor provided by VMware. This specific category offers an in-depth look at ESXi, with an emphasis on ESXCLI commands, ESXCLI Mindmap, and VMware Tools version mapping with Release Notes. The content includes detailed guides and tutorials for using ESXCLI commands, essential for efficient management and troubleshooting in ESXi environments. It also features illustrative ESXCLI Mindmaps, helping users better understand and navigate the complex structure of ESXCLI. The section on mapping VMware Tools versions with Release Notes provides useful information about different versions of VMware Tools and their specific features and enhancements.
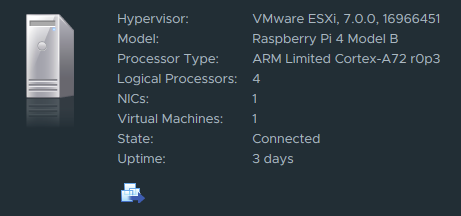
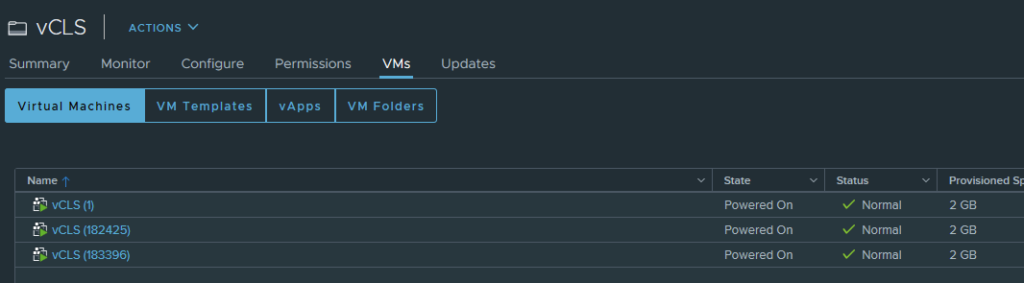
vCLS VMs are x86 and can’t run on an ESXi-Arm cluster in vSphere 7.0 U1. The workaround that keeps DRS working for ESXi-Arm Fling clusters.
The vSphere Clustering Service (vCLS) is a new capability that is introduced in the vSphere 7 Update 1 release. The issue is that the vCLS VMs are x86 and can not be deployed to an ESXi-Arm Cluster as the CPU architecture is not supported. But We could disable it according documentation:
What vCLS VMs do, how many run per cluster, what changed with embedded vCLS in vSphere 8.0 U3 and 9.x, and what you must not do to them.
vSphere Cluster Services (vCLS) are small agent VMs that vCenter runs in every cluster so that cluster services such as DRS keep a healthy, distributed control plane. vCLS arrived in vSphere 7.0 Update 1 as external vCLS (up to three VMs per cluster). vSphere 8.0 Update 3 replaced it with embedded vCLS (two VMs per cluster, based on vSphere Pod technology). From vSphere 9.0 you can even disable vCLS without affecting DRS or HA. Leave vCLS VMs alone unless you are diagnosing them.
What vCLS does
Starting with vSphere 7.0 Update 1, vCLS is enabled by default and runs in all vSphere clusters. It keeps cluster services available and maintains the resources and health of the workloads in the cluster even if vCenter Server becomes unavailable. The vCLS VMs are created automatically when you add hosts to a cluster, including clusters with only one or two hosts.
External vs embedded vCLS
External vCLS
Embedded vCLS
vSphere versions
7.0 Update 1 to 8.0 Update 2
8.0 Update 3 and later
Technology
Agent VMs deployed by the ESX Agent Manager (EAM)
vCLS VMs based on vSphere Pod technology, managed by the internal vpxd extension instead of EAM
VMs per cluster
Up to 3 (1 or 2 in one- and two-host clusters)
2, with at least 1 powered on for DRS
Naming
vCLS-{UUID}
vCLS-{UUID} (UUID of the ESXi host), plus the config option vCLSCRX.agent = true
In vSphere 7.0 and 8.0, removing vCLS from a cluster (Retreat Mode) stops DRS and makes HA placement suboptimal. Starting with vSphere 9.0, vCLS can be disabled on a cluster without any impact on DRS or HA (KB 316514). The steps for every version are in vCLS Retreat Mode: how to disable vCLS on a vSphere cluster.
Retrieving the password for vCLS VMs (external vCLS)
You can retrieve the password to log in to external vCLS VMs. Use it only for explicit diagnostics; to keep cluster services healthy, avoid logging in to vCLS VMs.
Log in to the vCenter Server Appliance over SSH.
Run /usr/lib/vmware-wcp/decrypt_clustervm_pw.py
Read the password from the PWD: line of the output.
What not to do with vCLS VMs
These operations can disrupt the healthy functioning of vCLS VMs:
Changing their power state
Reconfiguring resources: CPU, memory, disk size or disk placement
VM encryption, changing the BIOS, configuring PMem, enabling FT
Triggering vMotion of vCLS VMs
Removing them from the inventory, deleting them from disk, cloning them, or recovering them from a snapshot
Renaming the VMs or the vCLS folders, or moving them to another folder or a resource pool
Applying DRS rules and overrides, HA admission control policies or HA overrides to vCLS VMs
If you need vCLS out of the way, for example during storage maintenance, use Retreat Mode instead of touching the VMs.
CPU_SUPPORT ERROR in the ESXi installer? Press Shift+O and add allowLegacyCPU=true to turn it into a warning. Versions, limits (XSAVE), lab only.
Short answer: When the ESXi installer stops with CPU_SUPPORT ERROR: The CPU in this host is not supported by ESXi, reboot the installer and press Shift+O at the boot prompt. Append allowLegacyCPU=true and press Enter. The error becomes a CPU_SUPPORT WARNING that you can accept. This works on 7.0 and 8.0, and lab users report it on 9.x. It is not supported by Broadcom, so use it only in a homelab.
The error: “The CPU in this host is not supported by ESXi”
I first hit this on an older homelab server with the ESXi 7.0.0 installer (VMware-VMvisor-Installer-7.0.0-15843807.x86_64.iso):
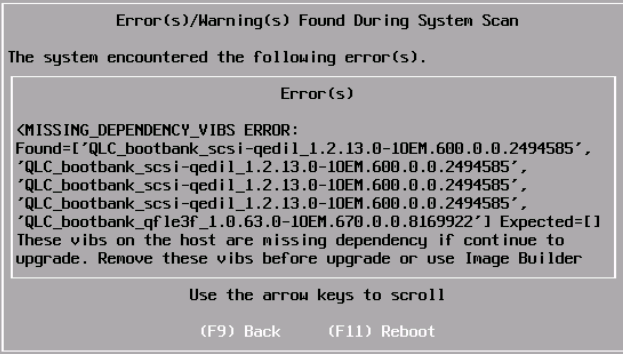
CPU_SUPPORT ERROR:
The CPU in this host is not supported by ESXi
7.0.0. Please refer to the VMware Compatibility Guide (VCG) for
the list of supported CPUs.
Without the boot option, the only way forward is F11 Reboot.
The installer offers only Back or Reboot. Newer installers add a pointer to KB 82794, which is now Broadcom KB 318697. For what that KB says and which CPUs it lists, see KB 82794 explained.
Why the installer blocks the CPU
Broadcom KB 318697 defines two stages. A deprecated CPU series gets a warning and the installation continues. A discontinued series is blocked with an error. The check is part of the installer precheck. On the 7.0.0 ISO it lives in \UPGRADE\PRECHECK.PY, and when I looked at that file (around line 1720) it also contained the allowLegacyCPU override. If you only see a warning, your CPU is deprecated, not discontinued, and you need no override.
How to use allowLegacyCPU=true (Shift+O)
Boot the ESXi installer ISO or USB.
When the installer boot screen shows Shift+O: Edit boot options, press Shift+O. The prompt is only shown for a few seconds. Shift+O is the documented way to edit installer boot options.
Leave the existing text (for example runweasel cdromBoot) in place and append a space plus the option.
Press Enter. The system scan now reports a warning instead of an error. Press Enter to continue.
allowLegacyCPU=true
Shift+O opens the boot options line.Append allowLegacyCPU=true to the existing boot options.Now it is only a warning, and Enter continues the installation.
CPU_SUPPORT WARNING:
The CPU in this host is not supported by ESXi
7.0.0. Please refer to the VMware Compatibility Guide (VCG) for
the list of supported CPUs.
Using allowLegacyCPU=true in boot.cfg and kickstart
Shift+O applies only to the current boot. To avoid typing it, put it on the kernelopt= line of boot.cfg on your installer media or PXE files. TechDocs documents that kernelopt= appends its string to the kernel boot options. William Lam also noted (for 7.0) that the option is not persistent after installation. For an installed host that needs it on every boot, he suggests adding it to kernelopt in both /bootbank/boot.cfg and /altbootbank/boot.cfg.
My own test on 7.0.0 (build 15843807); William Lam
ESXi 8.0 GA to 8.0 U1
Error becomes a warning
William Lam
ESXi 8.0 U2 and later
Still honoured, but the CPU must support XSAVE (Intel Sandy Bridge / AMD Bulldozer or newer). Older CPUs such as Westmere stop with VMB: 716: Unsupported CPU.
William Lam
ESX 9.0 / 9.1
Lab users report the same error-to-warning behaviour
Community reports only; not documented by Broadcom
allowLegacyCPU is not listed in Broadcom’s installation documentation or in KB 313264 (additional kernel boot options). It is an engineering override that has never been guaranteed and may disappear in any build.
What allowLegacyCPU=true does not give you
No support. The host runs on a CPU that is not in the Broadcom Compatibility Guide for that release.
No guarantee for updates. Any patch or update can add a new hard requirement, as 8.0 U2 did with XSAVE. Keep the previous boot bank so you can roll back.
Not the fix for a warning. For a deprecated CPU, patching with esxcli software profile update only needs --no-hardware-warning (Broadcom KB 391610). That host is still supported.
Not a production path. For production hosts with discontinued CPUs, KB 428874 describes RPQ/TQ requests for “VCF Software Only” support through your account team. Broadcom has also published a supported override procedure for Intel Skylake-SP on VCF 9.x. See Intel Skylake and ESX 9 support.
Disclaimer: this is not officially supported by VMware by Broadcom. You run it at your own risk.
Baselines are deprecated in vSphere 8 and can’t manage ESX 9. How to convert a cluster from vLCM baselines to an image, prerequisites and blockers.
Short answer: In the vSphere Client, select the cluster and open Updates > Image. vCenter runs an eligibility check first. Then you either use the image from a host in the cluster (vCenter 8.0 U3+), import a JSON image, or set one up manually. Finish with Finish image setup and remediate. The switch can’t be reversed. Baselines were deprecated in vSphere 8.0, and in vCenter 9.0 they can only patch ESXi 8.x hosts. You must convert before you move to ESX 9.
vLCM baselines status: deprecated in 8.0, removed for ESX 9
I wrote the first version of this post in 2020, right after upgrading my lab to ESXi 7.0. Back then images were new and optional. Here is what the Broadcom documentation says today:
Release
Baselines (VUM workflows)
Source
vSphere 7.0
Supported. vLCM images introduced as the declarative alternative.
KB 322186
vSphere 8.0
Deprecated. Still supported in vSphere 8, with removal planned for the next major release.
vSphere 8.0 release notes, KB 322186
vCenter 9.0
Removed as a way to manage clusters. Baselines only patch ESXi 8.x hosts. ESX 9 hosts can’t be patched or upgraded with them, ISO import and ISO-based upgrades are blocked, and new clusters and standalone hosts are image-managed by default.
VCF 9.0 release notes, KB 379388
So an existing baseline-managed cluster with 8.x hosts keeps working under vCenter 9.0, but it can’t reach ESX 9. According to KB 379388, the way around those restrictions is to move from VUM to vLCM images.
Prerequisites and what blocks the conversion
When you start the switch, vCenter runs the Check cluster’s eligibility to be managed with a single image task. Its results come in three types.
Errors (block the conversion)
A host is not stateful, for example an Auto Deploy stateless host. It must boot from a disk.
A host runs a version earlier than ESXi 7.0. Upgrade it with an upgrade baseline first.
VIBs from an unintegrated solution are present. Deactivate the solution and retry.
The cluster is currently being remediated against a baseline.
Warnings (need action)
A standalone VIB for which a component exists in the depot. Add that component to the image, or the VIB is deleted during remediation.
An unknown VIB, with no component in the depot. Import a component that contains it, or it is deleted during remediation.
Other prerequisites
All hosts from the same hardware vendor.
The vLCM image privileges.
For third-party solutions, confirmation from the vendor that they work with vLCM.
For the “use an image from a host” option: hosts on 7.0 U2 or later and vCenter on 8.0 U3 or later.
For VCF environments: do this only through SDDC Manager, on VCF 5.2.2 or later or VCF 9 (KB 385617). Don’t convert VCF clusters directly in vCenter.
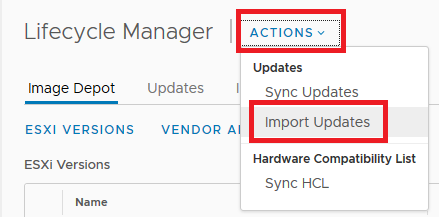
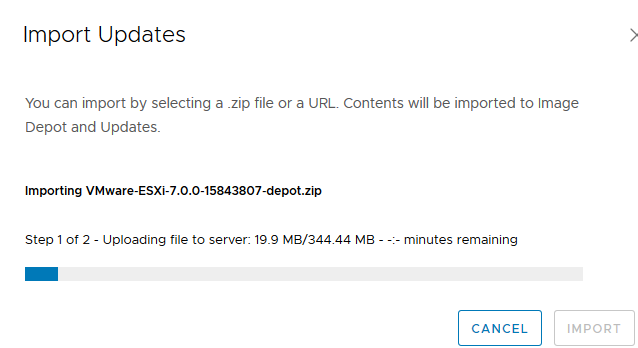
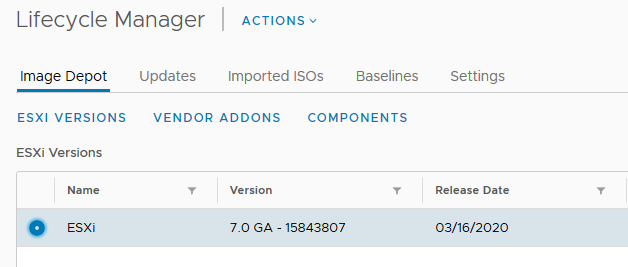
The depot also needs the content you plan to use in the image. On current releases, vLCM no longer downloads from the old public VMware URLs; each customer gets a unique download URL. See KB 390098 if the Software Depot doesn’t show recent releases. Offline, you can import a depot ZIP through Actions > Import Updates. These are my original vSphere 7.0 screenshots:
Lifecycle Manager: Actions > Import Updates (vSphere 7.0 UI)Importing VMware-ESXi-7.0.0-15843807-depot.zipImage Depot: ESXi 7.0 GA – 15843807 available after the import
How to convert vLCM baselines to an image (step by step)
These steps follow the TechDocs procedure for Option 3: Set Up a New Image Manually. Options 1 and 2 start the same way.
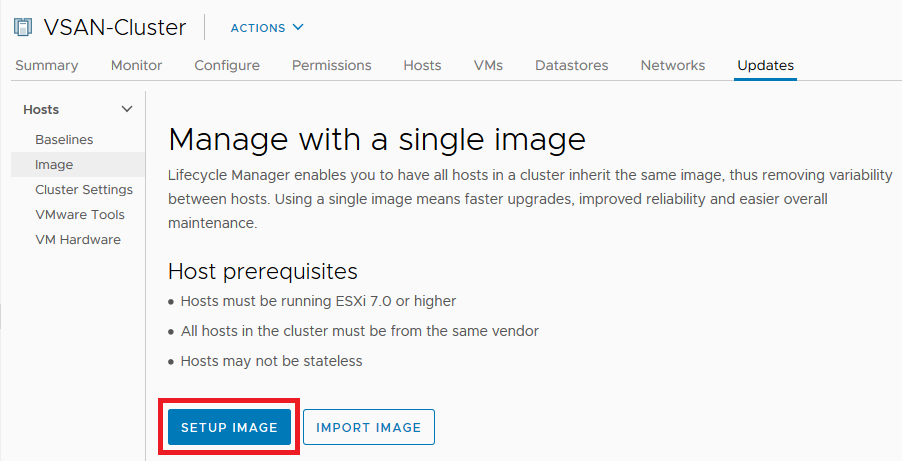
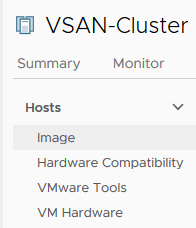
Open the image setup. In the vSphere Client, select the baseline-managed cluster and go to Updates > Image.
Choose how to build the image. Pick one of the three options. Set up image manually builds it by hand. Import image takes a JSON file. On vCenter 8.0 U3+, you can also choose one of the “Currently running images in the cluster” and click Proceed with selected image. The eligibility check runs; fix any errors and start again.
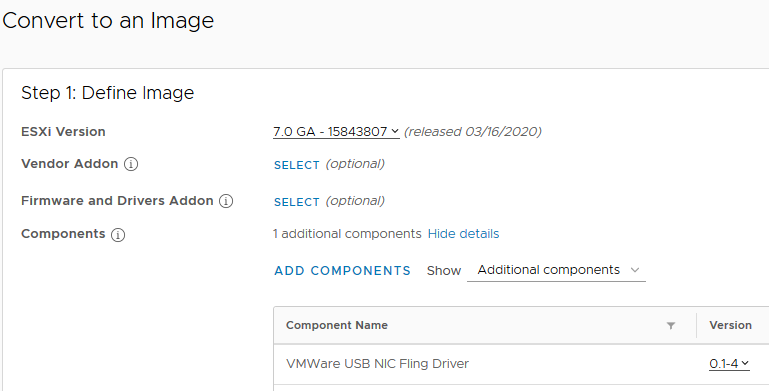
Define the image. In the Convert to an Image pane, select the ESXi Version. Optionally add a Vendor Addon, a Firmware and Drivers Addon (this needs a hardware support manager) and extra Components.
Validate and save. Click Validate to catch missing dependencies and conflicts, then Save. Saving triggers a compliance check of all hosts against the image.
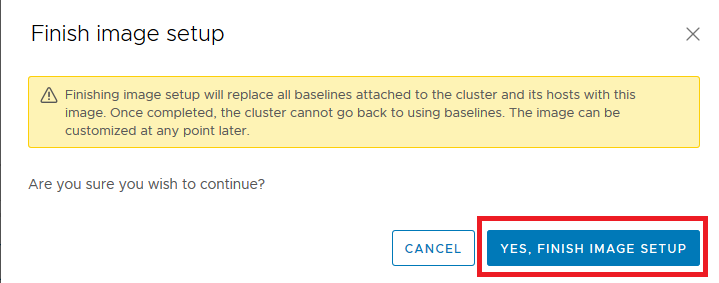
Finish the setup. Click Finish image setup and confirm with Yes, finish image setup. From now on the cluster is managed by a single image.
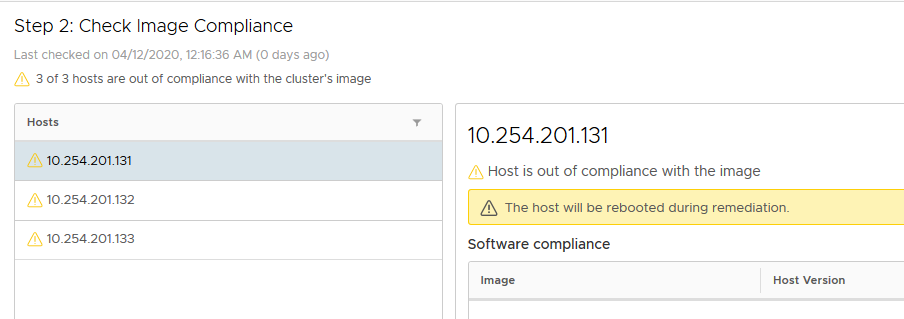
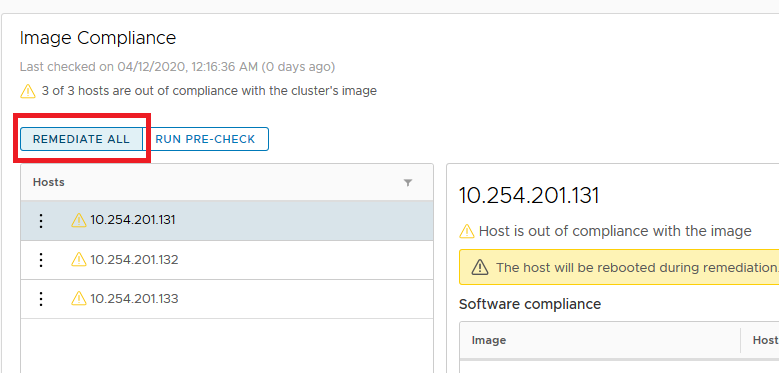
Remediate. Run the pre-check and then Remediate All. Switching the management method alone does not change the hosts; only remediation applies the image.
Cluster > Updates: start with SETUP IMAGE (vSphere 7.0 UI)Select the ESXi version and add components (example: USB NIC Fling driver)Step 2: image compliance check (3 of 3 hosts out of compliance before remediation)Finish image setup: confirm with YESAfter the conversion the Baselines menu disappearsREMEDIATE ALL: start dialogSTART REMEDIATION installs the example USB NIC Fling driver
What changes after the switch
There is no way back. A cluster can’t return to baselines. You can only move hosts into another cluster that still uses baselines.
Remediation removes what the image doesn’t include. Standalone VIBs and agents of non-integrated solutions are deleted. Put every driver and tool you need into the image first.
Standalone hosts keep the image only under certain conditions. A host removed from an image-managed cluster keeps the image only when vCenter and ESXi are 8.0 U3+ and NSX, if present, is 4.2 or later. Otherwise it reverts to baselines.
Unsupported configurations are still possible. If you enable a solution that doesn’t work with vLCM on an empty cluster (Dell EMC VxRail is the documented example), the transition succeeds but the configuration is unsupported.
Move from vSphere 6 Update Manager to vSphere 7 Lifecycle Manager and upgrade ESXi 6.7 hosts to ESXi 7.0 step by step.
vSphere Update Manager – vSphere 6
In vSphere 6 we can use various methods and tools to deploy ESXi hosts and maintain their software lifecycle.
To deploy and boot an ESXi host, you can use an ESXi installer image or VMware vSphere® Auto Deploy™. The availability of choice options results in two different underlying ESXi platforms:
Using vSphere Auto Deploy – stateless mode
Using an installer ESXi image – statefull mode
vSphere Lifecycle Manager Images: A Single Platform, Single Tool, Single Workflow
By introducing the concept of images, vSphere Lifecycle Manager provides a unified platform for ESXi lifecycle management. You can use vSphere Lifecycle Manager for stateful hosts only, but starting with vSphere 7.0, you can convert the Auto Deploy-based stateless hosts into stateful hosts, which you can add to clusters that you manage with vSphere Lifecycle Manager images.
How to Upgrade ESXi 6.7 to 7 with vSphere Lifecycle Manager?
After upgrade VCSA 7.0, We prepare upgrade for ESXi 6.7. It is simular logic like in vSphere Update Manager:
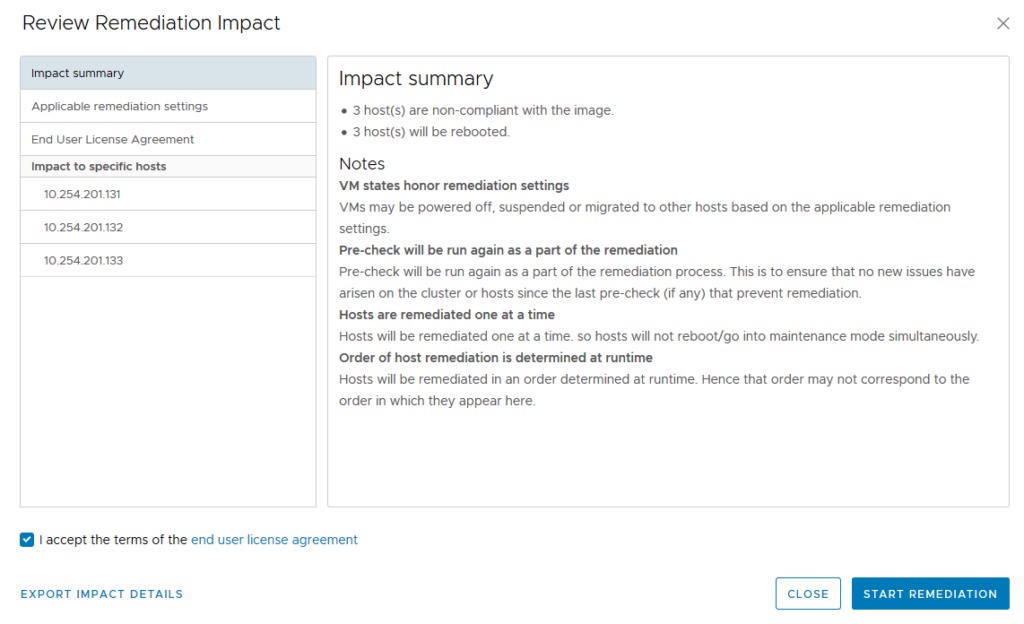
IMPORT ISO – We can upload ISO for example VMware-VMvisor-Installer-7.0.0-15843807.x86_64.isoStep 1 of 2 – Uploading file to serverStep 2 of 2 – Adding to repositoryAfter ISO upload We could check ISO image contextNext step is Create BaselineCreate Baseline – for ISO imageSelect uploaded ISO imageCheck summaryOn Targer Cluster We attach our BaselineSelect ESXi 7 Baseline– Check Compliance – We can see Non-compliant for 3x ESXi hostREMEDIATE will start upgrade dialogeIt is necessary accept EULAREMEDIATE will start ESXi 7 upgradeIn Recent Task We caould chek progress.We can check ESXi 7.0 upgrade result.
Short answer: Three BIOS tokens cut Cisco UCS M5 boot time. Adaptive Memory Training = Enabled reuses saved memory training results if the server reboots within 24 hours. OptionROM Launch Optimization = Enabled launches Option ROMs only for controllers in the boot policy. BIOS Techlog Level = Minimum logs only critical messages. From UCS Manager 4.0(2a) these are the M5 defaults, so check that nothing overrides them. On a B480 M5 with 3 TB RAM, each boot after the first was about 2 minutes faster.
Cisco UCS M5 boot time BIOS tokens
Token (UCS Manager BIOS policy)
Supported values on M5
Default on M5 (4.0(2a) and later)
Value for faster boot
Adaptive Memory Training
Enabled, Disabled
Enabled
Enabled
OptionROM Launch Optimization
Enabled, Disabled
Enabled
Enabled
BIOS Techlog Level
Maximum, Normal, Minimum
Minimum
Minimum
Cisco’s BIOS token guide lists Adaptive Memory Training for B200 M5, B480 M5, C220 M5, C240 M5, C480 M5, C480 M5 ML and S3260 M5. It lists the other two tokens for all M5 servers. The tokens appear from the 4.0(2a) section of the guide onwards. Older firmware may not have them, or may use different defaults.
Adaptive Memory Training
From the UCS Manager Server Management Guide (Boot Options BIOS Settings): when this token is enabled, the BIOS saves the memory training results (optimized timing and voltage values) together with the CPU and memory configuration, and reuses them on later reboots to save boot time. The saved results are used only if the reboot happens within 24 hours of the last save. In my experience it has the biggest effect on large-memory hosts.
OptionROM Launch Optimization
Option ROM launch is controlled per PCI slot and is enabled by default. With many network controllers and storage HBAs, every Option ROM may launch even though only a few controllers take part in booting. With this token enabled, Option ROMs launch only for the controllers listed in the boot policy. So keep the boot policy accurate: a device that is missing from it will not get its Option ROM.
BIOS Techlog Level
This sets which messages go to the BIOS tech log. Minimum logs critical messages only and is the default. Normal adds warning and loading messages, and Maximum adds informational messages. Keep Minimum in production and raise it only when Cisco TAC asks for verbose BIOS logs.
Correction to my 2020 version: I described the “BIOS Techlog Level” token as an Enabled/Disabled switch that makes the tech log more granular. That description belongs to a different token, BIOS Tech Message Level Control, which the guide lists for the C125 M5.
How to set the tokens in UCS Manager
Open the BIOS policy that your service profiles or templates use (Servers > Policies > root > BIOS Policies).
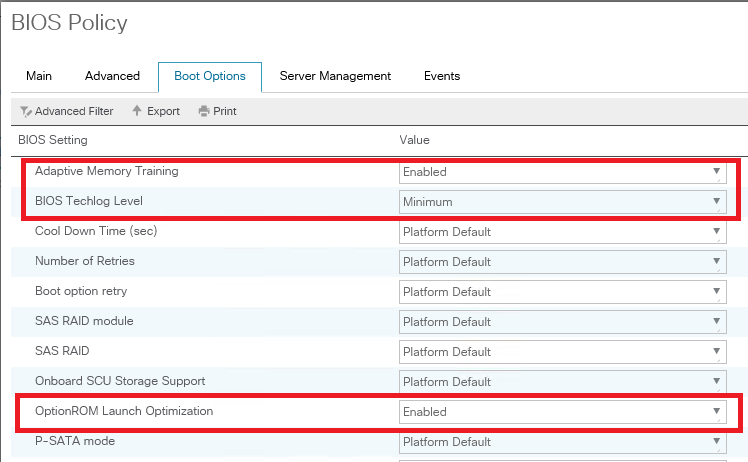
On the Boot Options settings, set Adaptive Memory Training and OptionROM Launch Optimization to Enabled, and BIOS Techlog Level to Minimum. “Platform Default” gives the same result on 4.0(2a) and later firmware. Set them explicitly if you want the policy to show the intent.
Check the boot policy. It should contain every device you really boot from (for example the SAN or M.2 boot device and any PXE vNIC).
BIOS changes take effect at the next server reboot. Put the ESXi host into maintenance mode and reboot it according to the service profile’s maintenance policy.
Results on a B480 M5 with 3 TB RAM
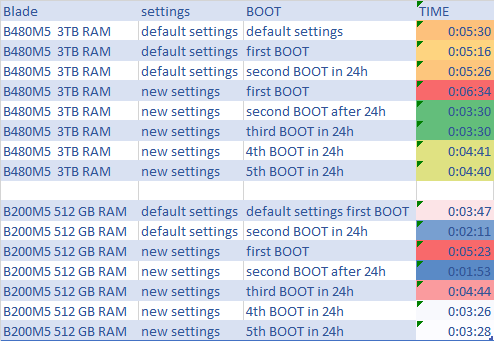
The first boot after the change took about 1 to 2 minutes longer.
From the second boot on, each boot was about 2 minutes shorter.
After 24 hours without a reboot, the saved training data is no longer used, so the next boot is a full-training boot again.
Other tokens that affect boot time
Quiet Boot controls only what is displayed during POST (logo vs messages and Option ROM information).
Enhanced Memory Test (the M6 name; Cisco notes it was renamed from Advanced Memory Test) runs extended memory tests during boot and “increases the boot time based on the memory”. Cisco recommends leaving it at Auto.
UCS Manager CLI interactive mindmap: the BIOS policy scopes (/org/bios-policy, token settings) and every other UCSM CLI command from Cisco’s CLI guides