Daniel Micanek virtual Blog – Like normal Dan, but virtual.
Category: NSX
The “VMware NSX” blog category focuses on VMware NSX, an advanced network virtualization and security platform developed by VMware. This blog category offers extensive information and expertise on VMware NSX, including detailed guides, tutorials, technical analyses, and the latest updates.
More info in the NSX-T Data Center Administration Guide.
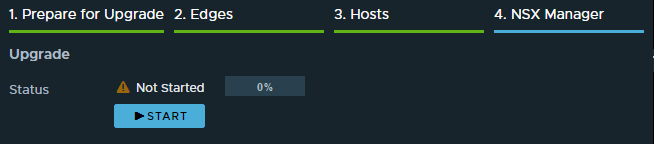
Click Start to upgrade the Management plane
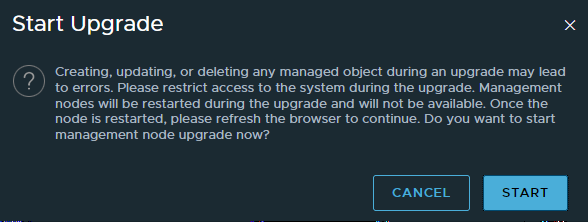
Accept the upgrade notification
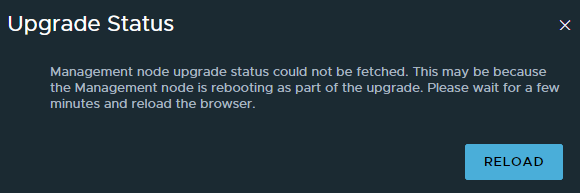
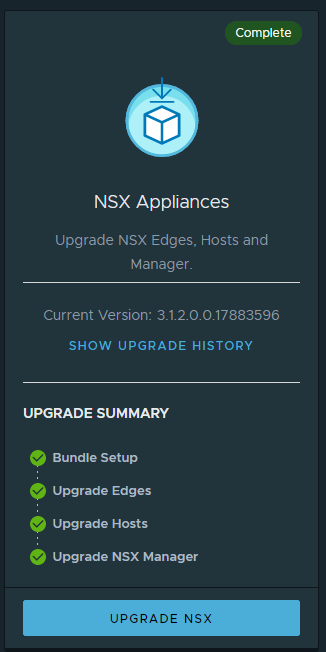
Monitor the upgrade progress from the NSX Manager CLI for the orchestrator node.
tanzu-nsx> get upgrade progress-status

 Node Upgrade has been started. Please do not make any changes, until
 the upgrade operation is complete. Run "get upgrade progress-status"
 to show the progress of last upgrade step.

 Tue May 18 2021 UTC 22:38:49.533
 Upgrade info:
 From-version: 3.1.1.0.0.17483186
 To-version: 3.1.2.0.0.17883600
 Upgrade steps:
 download_os [2021-05-18 22:35:57 - 2021-05-18 22:38:04] SUCCESS
 shutdown_manager [2021-05-18 22:38:15 - ] IN_PROGRESS
     Status: cloud-init status command returned output active.
 Some appliance components are not functioning properly.
 Component health: MANAGER:UNKNOWN, POLICY:UNKNOWN, SEARCH:UNKNOWN, NODE_MGMT:UP, UI:UP.
 Error code: 101
tanzu-nsx> get upgrade progress-status

 Node Upgrade has been started. Please do not make any changes, until
 the upgrade operation is complete. Run "get upgrade progress-status"
 to show the progress of last upgrade step.

 Tue May 18 2021 UTC 23:09:58.930
 Upgrade info:
 From-version: 3.1.1.0.0.17483186
 To-version: 3.1.2.0.0.17883600
 Upgrade steps:
 download_os [2021-05-18 22:35:57 - 2021-05-18 22:38:04] SUCCESS
 shutdown_manager [2021-05-18 22:38:15 - 2021-05-18 22:56:22] SUCCESS
 install_os [2021-05-18 22:56:22 - 2021-05-18 22:58:34] SUCCESS
 migrate_manager_config [2021-05-18 22:58:34 - 2021-05-18 22:58:44] SUCCESS
 switch_os [2021-05-18 22:58:44 - 2021-05-18 22:59:06] SUCCESS
 reboot [2021-05-18 22:59:06 - 2021-05-18 23:00:04] SUCCESS
 run_migration_tool [2021-05-18 23:03:11 - 2021-05-18 23:03:16] SUCCESS
 start_manager [2021-05-18 23:03:16 - ] IN_PROGRESS
tanzu-nsx> get upgrade progress-status
 Tue May 18 2021 UTC 23:21:33.659
 Upgrade is not in progress
Cisco nenic Geneve offload: introduced with VIC driver 4.1(2a)/nenic 1.0.33.0, extended in 1.0.35.0. How to enable, verify, and current nenic for ESXi 8.
Short answer: Cisco’s VIC driver release notes first list nenic Geneve offload for ESXi in the 4.1(2a) driver release, which shipped nenic 1.0.33.0 for ESXi 6.7 U3 and 7.0. The 4.1(3a) release shipped nenic 1.0.35.0, which added ESXi 7.0 U1, plus the first nenic_ens driver for the NSX Enhanced Datapath. In UCS Manager, Geneve offload is disabled by default. You enable it per adapter policy on VIC 1400, 14000 or 15000. For ESXi 8, Cisco’s current driver is nenic 2.0.17.0.
I wrote the original post in January 2021 from the VMware download page for nenic 1.0.35.0 (ESXi 6.7). That page listed “Enabled Geneve Offload support for VIC 14xx adapters” as a new feature. The page has since been retired, and Cisco’s own release notes put the Geneve feature one driver release earlier. This update, from September 2026, follows the Cisco documentation.
Which nenic version introduced Geneve offload
Cisco VIC driver release
ESXi nenic
Supported ESXi
Geneve note in the release notes
4.1(1a)
1.0.31.0
6.5 U3, 6.7 U2/U3
none
4.1(2a)
1.0.33.0
6.5 U3, 6.7 U2/U3, 7.0
New: “GENEVE Offload supports on ESX 6.7U3 and ESX 7.0”
4.1(3a)
1.0.35.0
6.5 U3, 6.7 U2/U3, 7.0, 7.0 U1
New: “GENEVE Offload is supported on ESX 7.0U1”. First nenic_ens drivers: 1.0.2.0 (ESXi 6.7 U3) and 1.0.4.0 (ESXi 7.0, 7.0 U1)
Cisco’s VIC 1400 best-practices white paper gives the same timeline from the firmware side. Geneve offload on the fourth-generation VIC is supported for ESXi “starting from Cisco UCSM and Cisco IMC release 4.1(2)”. Enhanced Datapath (ENS) support arrived with 4.1(3) and needs the additional nenic-ens driver.
So for NSX-T in standard (non-ENS) mode on VIC 1400, the minimum is the 4.1(2) firmware plus nenic 1.0.33.0. 1.0.35.0 is the version that brought ESXi 7.0 U1 support and the ENS path.
Enable nenic Geneve offload in UCS Manager
Per the UCS Manager 4.3 Network Management Guide, GENEVE offload is supported on ESXi with VIC 1400, 14000 and 15000 series adapters. It is present in all Ethernet adapter policies and disabled by default. Cisco’s recommended adapter policy for it:
Setting
Value
Transmit queues / ring size
1 / 4096
Receive queues / ring size
8 / 4096
Completion queues
16
Interrupts
32
RSS
Enabled
GENEVE offload
Enabled
For ENS, the VIC 1400 white paper recommends a single TX and RX queue with 4096 rings, and states that there is no RSS support on VIC 1400 for Geneve offload with ENS.
Limitations
Not supported on VIC 1200 and 1300 series.
External outer IPv6 is not supported with GENEVE offload.
RoCEv2 cannot be used with GENEVE offload. Azure Stack QoS is also excluded.
Remove the GENEVE offload configuration before downgrading to a release that does not support it.
Verify Geneve offload on the ESXi host
Broadcom KB 397644 shows how to confirm it. Look for VMNET_CAP_GENEVE_OFFLOAD under “Device Hardware Cap Activated”. In vmkernel.log, look for the nenic lines showing geneve yes and Geneve: Overlay offload enabled, udp_port = 6081:
vsish -e get /net/pNics/vmnic0/properties | grep "Driver\|Device Hard\|Device Soft"
# then check /var/log/vmkernel.log for the nenic Geneve lines
The same KB notes that the RX queue filter class for Geneve (the NetQueue Geneve filter) is not configured on nenic. That is expected: the filter is supported only by nenic_ens, and it is separate from checksum offload.
Current nenic versions for ESXi 8 and 9
Cisco VIC driver release notes
nenic
nenic_ens
ESXi
4.3(2), 4.3(4)
2.0.11.0 (2.0.10.0 for 7.0 Ux)
1.0.6.0
8.0, 8.0 U1 (7.0 U1–U3)
4.3(6)
2.0.17.0
1.0.9.0
7.0 U1–U3, 8.0 and above
6.0(1)
2.0.17.0
1.0.9.0
7.0 U1–U3, 8.0 and above
6.0(2)
2.0.17.0
1.0.18.0
8.0 and above
Cisco’s VIC driver release notes say “ESX 8.0 and above” for nenic but do not name ESX 9.0 for it (the same document names ESX 9.0 for the fnic driver). Before you deploy on VCF 9, check the Broadcom Compatibility Guide for the exact nenic and VIC firmware pair certified for your ESX build.
Where to download nenic now
The old my.vmware.com download link no longer works. Async drivers are now on the Broadcom Support Portal, which requires a Broadcom account (see Broadcom KB 142814 on downloading Broadcom products). Use the Broadcom Compatibility Guide to pick the version.
Mellanox ConnectX-2 NICs stop working after upgrading a homelab host from ESXi 6.7 to 7.0. Why, and the patch that brings them back. Unsupported, lab only.
I upgraded vCenter to version 7 successfully but failed when it came to updating my hosts from 6.7 to 7.
I got some warning stating PCI devices were incompatible but tried anyways. Turns out that failed, my Mellanox ConnectX 2 wasn’t showing up as an available physical NIC.
At first It was necessary to have VID/DID device code for MT26448 [ConnectX EN 10GigE , PCIe 2.0 5GT/s].
Partner
Product
Driver
VID
DID
Mellanox
MT26448 [ConnectX EN 10GigE , PCIe 2.0 5GT/s]
mlx4_core
15b3
6750
Whole table We could check here or search mlx to see all Mellanox cards list.
Deprecated devices supported by VMKlinux drivers
Devices that were only supported in 6.7 or earlier by a VMKlinux inbox driver. These devices are no longer supported because all support for VMKlinux drivers and their devices have been completely removed in 7.0.
*********************************************************************
/vmfs/volumes/ISO/tmp-network/etc/vmware/default.map.d/nmlx4_core.map
*********************************************************************
regtype=native,bus=pci,id=15b301f6..............,driver=nmlx4_core
regtype=native,bus=pci,id=15b301f8..............,driver=nmlx4_core
regtype=native,bus=pci,id=15b31003..............,driver=nmlx4_core
regtype=native,bus=pci,id=15b31004..............,driver=nmlx4_core
regtype=native,bus=pci,id=15b31007..............,driver=nmlx4_core
regtype=native,bus=pci,id=15b3100715b30003......,driver=nmlx4_core
regtype=native,bus=pci,id=15b3100715b30006......,driver=nmlx4_core
regtype=native,bus=pci,id=15b3100715b30007......,driver=nmlx4_core
regtype=native,bus=pci,id=15b3100715b30008......,driver=nmlx4_core
regtype=native,bus=pci,id=15b3100715b3000c......,driver=nmlx4_core
regtype=native,bus=pci,id=15b3100715b3000d......,driver=nmlx4_core
regtype=native,bus=pci,id=15b36750..............,driver=nmlx4_core
------------------------->Last Line is FIX
And add HW ID support in file nmlx4_core.ids:
**************************************************************************************
/vmfs/volumes/FreeNAS/ISO/tmp-network/usr/share/hwdata/default.pciids.d/nmlx4_core.ids
**************************************************************************************
#
# This file is mechanically generated.  Any changes you make
# manually will be lost at the next build.
#
# Please edit <driver>_devices.py file for permanent changes.
#
# Vendors, devices and subsystems.
#
# Syntax (initial indentation must be done with TAB characters):
#
# vendor  vendor_name
#       device  device_name                            <-- single TAB
#               subvendor subdevice  subsystem_name    <-- two TABs

15b3  Mellanox Technologies
        01f6  MT27500 [ConnectX-3 Flash Recovery]
        01f8  MT27520 [ConnectX-3 Pro Flash Recovery]
        1003  MT27500 Family [ConnectX-3]
        1004  MT27500/MT27520 Family [ConnectX-3/ConnectX-3 Pro Virtual Function]
        1007  MT27520 Family [ConnectX-3 Pro]
                15b3 0003  ConnectX-3 Pro VPI adapter card; dual-port QSFP; FDR IB (56Gb/s) and 40GigE (MCX354A-FCC)
                15b3 0006  ConnectX-3 Pro EN network interface card 40/56GbE dual-port QSFP(MCX314A-BCCT )
                15b3 0007  ConnectX-3 Pro EN NIC; 40GigE; dual-port QSFP (MCX314A-BCC)
                15b3 0008  ConnectX-3 Pro VPI adapter card; single-port QSFP; FDR IB (56Gb/s) and 40GigE (MCX353A-FCC)
                15b3 000c  ConnectX-3 Pro EN NIC; 10GigE; dual-port SFP+ (MCX312B-XCC)
                15b3 000d  ConnectX-3 Pro EN network interface card; 10GigE; single-port SFP+ (MCX311A-XCC)
        6750  Mellanox ConnectX-2 Dual Port 10GbE
-------->Last Line is FIX
After reboot I could see support for MT26448 [ConnectX EN 10GigE , PCIe 2.0 5GT/s].
Only ALERT: Failed to verify signatures of the following vib(s): [nmlx4-core].
2020-XX-XXTXX:XX:44.473Z cpu0:2097509)ALERT: Failed to verify signatures of the following vib(s): [nmlx4-core]. All tardisks validated
2020-XX-XXTXX:XX:47.909Z cpu1:2097754)Loading module nmlx4_core ...
2020-XX-XXTXX:XX:47.912Z cpu1:2097754)Elf: 2052: module nmlx4_core has license BSD
2020-XX-XXTXX:XX:47.921Z cpu1:2097754)<NMLX_INF> nmlx4_core: init_module called
2020-XX-XXTXX:XX:47.921Z cpu1:2097754)Device: 194: Registered driver 'nmlx4_core' from 42
2020-XX-XXTXX:XX:47.921Z cpu1:2097754)Mod: 4845: Initialization of nmlx4_core succeeded with module ID 42.
2020-XX-XXTXX:XX:47.921Z cpu1:2097754)nmlx4_core loaded successfully.
2020-XX-XXTXX:XX:47.951Z cpu1:2097754)<NMLX_INF> nmlx4_core: 0000:05:00.0: nmlx4_core_Attach - (nmlx4_core_main.c:2476) running
2020-XX-XXTXX:XX:47.951Z cpu1:2097754)DMA: 688: DMA Engine 'nmlx4_core' created using mapper 'DMANull'.
2020-XX-XXTXX:XX:47.951Z cpu1:2097754)DMA: 688: DMA Engine 'nmlx4_core' created using mapper 'DMANull'.
2020-XX-XXTXX:XX:47.951Z cpu1:2097754)DMA: 688: DMA Engine 'nmlx4_core' created using mapper 'DMANull'.
2020-XX-XXTXX:XX:49.724Z cpu1:2097754)<NMLX_INF> nmlx4_core: 0000:05:00.0: nmlx4_ChooseRoceMode - (nmlx4_core_main.c:382) Requested RoCE mode RoCEv1
2020-XX-XXTXX:XX:49.724Z cpu1:2097754)<NMLX_INF> nmlx4_core: 0000:05:00.0: nmlx4_ChooseRoceMode - (nmlx4_core_main.c:422) Requested RoCE mode is supported - choosing RoCEv1
2020-XX-XXTXX:XX:49.934Z cpu1:2097754)<NMLX_INF> nmlx4_core: 0000:05:00.0: nmlx4_CmdInitHca - (nmlx4_core_fw.c:1408) Initializing device with B0 steering support
2020-XX-XXTXX:XX:50.561Z cpu1:2097754)<NMLX_INF> nmlx4_core: 0000:05:00.0: nmlx4_InterruptsAlloc - (nmlx4_core_main.c:1744) Granted 38 MSIX vectors
2020-XX-XXTXX:XX:50.561Z cpu1:2097754)<NMLX_INF> nmlx4_core: 0000:05:00.0: nmlx4_InterruptsAlloc - (nmlx4_core_main.c:1766) Using MSIX
2020-XX-XXTXX:XX:50.781Z cpu1:2097754)Device: 330: Found driver nmlx4_core for device 0xxxxxxxxxxxxxxxxxxxxxxx
Some 10 Gbps tuning testing looks great, between 2x ESXi 7.0 with 2x MT2644:
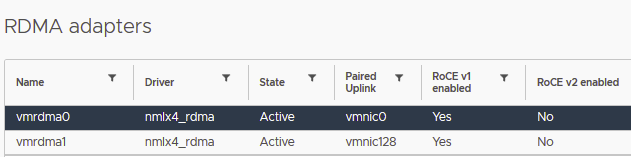
Support for RoCEv2 is above card – Mellanox ConnectX-3 Pro
We can see RoCEv2 options in nmlx2_core driver, but when I enabled enable_rocev2 It is NOT working
[root@esxi~] esxcli system module parameters list -m nmlx4_core
Name                    Type  Value  Description
----------------------  ----  -----  -----------
enable_64b_cqe_eqe      int          Enable 64 byte CQEs/EQEs when the the FW supports this
enable_dmfs             int          Enable Device Managed Flow Steering
enable_qos              int          Enable Quality of Service support in the HCA
enable_rocev2           int          Enable RoCEv2 mode for all devices
enable_vxlan_offloads   int          Enable VXLAN offloads when supported by NIC
log_mtts_per_seg        int          Log2 number of MTT entries per segment
log_num_mgm_entry_size  int          Log2 MGM entry size, that defines the number of QPs per MCG, for example: value 10 results in 248 QP per MGM entry
msi_x                   int          Enable MSI-X
mst_recovery            int          Enable recovery mode(only NMST module is loaded)
rocev2_udp_port         int          Destination port for RoCEv2
It is officialy NOT supported. Use it only in your HomeLAB. But We could save some money for new 10Gbps network cards.
How to check, change or disable NSX password expiration for admin, root and audit on Manager and Edge, via CLI or API, and what changes in VCF 9.
Short answer: NSX Manager and NSX Edge local passwords (admin, root, audit) expire after 90 days by default. Log in to the NSX CLI as admin on each appliance and run clear user <user> password-expiration to disable expiration, or set user <user> password-expiration <1-9999> to change it. Verify with get user <user> password-expiration. The API field is password_change_frequency (0 disables). In VCF 9, Broadcom recommends rotation instead of never-expire.
Default NSX password expiration
Password expiration was introduced in NSX-T 2.4.0. Since then, the local accounts on NSX Manager and NSX Edge appliances expire 90 days after the last password change, and users get warning messages 7 days before expiry. When the admin password expires you can no longer log in to the NSX Manager UI, and any task or API call that uses that account fails. That is why an expired NSX password often shows up first as a broken integration (vCenter, backup, SDDC Manager, monitoring), not as a login prompt.
Check NSX password expiration
Connect to the appliance over SSH or the console as admin and check each local account:
nsx-mgr> get user admin password-expiration
Password expires 90 days after last change
User will receive warning messages 7 days before password expires.

nsx-mgr> get user root password-expiration
nsx-mgr> get user audit password-expiration
If the password is already expired, the output says Current password expired ## day ago. The appliance also logs upcoming expiry in /var/log/auth.log (entries such as password for user admin will expire in 1 days), and NSX raises the “Password expired” / “Password about to expire” alarms in the UI.
NSX disable password expiration (CLI)
The same NSX CLI commands work on NSX-T 3.x, NSX 4.x and NSX 9.x, on both Manager and Edge nodes. Run them as admin:
# Disable expiration (password never expires)
nsx-mgr> clear user admin password-expiration
nsx-mgr> clear user root password-expiration
nsx-mgr> clear user audit password-expiration

# Verify
nsx-mgr> get user admin password-expiration
Password expiration not configured for this user
If your security policy does not allow passwords that never expire, set a longer interval instead. The allowed range is 1 to 9999 days:
nsx-mgr> set user admin password-expiration 9999
nsx-mgr> set user root password-expiration 9999
nsx-mgr> set user audit password-expiration 9999
Practical notes:
Run the commands on every appliance where the account exists: each NSX Manager node and each NSX Edge node. Then verify with get user … password-expiration on each node rather than assuming it applied everywhere.
NSX 4.1.x only: changing a password with set user admin password resets a custom expiration back to 90 days (KB 376166). It is fixed in NSX 4.2.0 and later. On 4.1.x, re-run set user … password-expiration or clear user … password-expiration after every password change.
Resetting an expired password does not reset the expiration date. Extend it separately with the CLI or API.
API alternative: password_change_frequency
Password expiration is a property of the node user (NodeUserProperties). The field password_change_frequency holds the number of days; setting it to 0 disables password expiration. Broadcom documents these endpoints:
# Local node (the Manager you call)
PUT /api/v1/node/users/{userid}

# A specific Manager cluster node
PUT /api/v1/cluster/{cluster-node-id}/node/users/{userid}

# An Edge / transport node
PUT /api/v1/transport-nodes/{transport-node-id}/node/users/{userid}
Read the user first (GET on the same path), change password_change_frequency in the body and send it back with PUT. Check the “Update node user” call in the NSX API reference for your release for the exact required fields. The API route is the better choice when you manage many Edge nodes or want the change in an automation pipeline.
NSX password expired: how to recover
Expired admin or audit password
Log in as root, switch to admin with su admin, and set a new password. You need to know the current (expired) password:
nsx-mgr> set user admin password
Current password:
New password:
Confirm new password:

nsx-mgr> clear user admin password-expiration
In the UI, admin can reset expired passwords of other local users (System > User Management or the password-expiry notification), but not its own. Guest users cannot be reset from the CLI.
Expired root password
If you try st en with an expired root password, NSX refuses to open the root shell and tells you to run set user root password as admin. If admin is not accessible but you know the root password, a direct SSH/console login as root forces a password change. If you know neither password, follow “Resetting the Passwords of an Appliance” (GRUB edit during a reboot). KB 408091 also describes how to propagate a manually changed root password to the other Manager nodes in the cluster. Afterwards set the expiration again:
nsx-mgr> set user root password-expiration 9999
nsx-mgr> set user admin password-expiration 9999
NSX in VCF 9: rotate instead of disabling
In VMware Cloud Foundation, NSX Manager credentials belong to VCF password management, so changing them only on the appliance is different from standalone NSX:
Broadcom KB 435599 (VCF 9.x) says “Never Expire” is not a supported state for core components in the automated lifecycle engine and recommends configuring automatic rotation instead. Changing account properties directly on NSX with the CLI can cause compliance drift during SDDC Manager inventory syncs or LCM operations.
From VCF 9.1, password policies (length, complexity, expiration, lockout) are created in VCF Operations and assigned to the fleet or to a VCF instance. VCF Operations then flags non-compliant components and can remediate them.
Known issue in VCF Operations 9.1.x (KB 448813): NSX users set to never expire can still trigger a false “NSX password expired” alert. The KB workaround is to set a finite value above 90 days, e.g. set user admin password-expiration 365.
My recommendation: in a lab or standalone NSX, clear user … password-expiration is fine. In production VCF, keep expiration enabled, rotate passwords from VCF Operations or SDDC Manager, and use the CLI only to recover an account that has already expired.
We are excited to announce the general availability of VMware NSX-T™ 3.0, a major release of our full stack Layer 2 to Layer 7 networking platform that offers virtual networking, security, load balancing, visibility, and analytics in a single platform. NSX-T 3.0 includes key innovations across cloud-scale networking, security, containers, and operations that help enterprises achieve one-click public cloud experience wherever their workloads are deployed. As enterprises adopt cloud,…Read More
The @TietoCorp architect who has implemented this a year ago is @danielmicanek It would be great to meet and chat together if he will attend the VMUG in Prague next week.
Disaster Recovery (DR) and Disaster Avoidance (DA) on VMware Cloud on AWS is still one of the most popular use case amongst our customers, just second to Datacenter Migration and Evacuation. The VMware Site Recovery service makes it extremely easy and cost effective for customers to protect their critical workloads without having to worry about […]